Introduction to Git and GitHub | Part 1
An introductory course on Git and GitHub with in-depth intuition.

Hi, I'm Nishant Banjade, a Software Engineer at Ellucian, committed to transforming education through technology. With expertise in developing CRM systems, plugins, workflows, APIs, and customized solutions for Higher Education, I bring a strong focus on innovation and efficiency. Currently, I'm honing my skills in full-stack software development, system design, data structures, algorithms, and Microsoft Dynamics 365.
I am a skilled software developer with expertise in C#/.NET, D365, JavaScript, TypeScript, ReactJS, SQL, and cloud technologies like AWS, along with experience in RabbitMQ, Docker, MUI, Tailwind, JIRA, and Git.
Introduction
Let us suppose, you and your team are assigned work to code a simple news portal website. On completion of the project, all of you will be awarded with a prize money. But the problem here was you and your friends are far from each other. Now you have no idea how to complete the project together because a single person cannot code the entire website in a limited time. You now asked your senior how to do the task together yet being far from each other. The senior advised him to see the Git and GitHub blog of Nishant Banjade. Let’s study this together and win the prize money.
In almost every git tutorial, you see git is a version control system in the first line. But you are not told enough about the version control system efficiently.
Version Control
Basically, the version control system is the system that is responsible for managing and recording the changes made to the computer programs, documents, large web sites, or other collections of information so that in future you can easily view the first version of the system. In simple terms, say you are making the same news portal website. You are slowly progressing in the development work and you wanted to see what changes were made by you on the third day of the project. Now using the version control system, you can easily trace the history of the changes made by you over time.
Changes are usually identified by a number or letter code, termed the “revision number”, “revision level”, or simply “revision”. Each revision is associated with a timestamp and the person making the change. Revisions can be compared, restored, and, with some types of files, merged.
Using a version control system in a team is very efficient because it allows you to collaborate in a team. If someone is designing a front-end from Asia and another is developing a backend from America, there will be no problem at all during the collaboration.
Git Overview
Git is a version control system that allows users to maintain history of the project at a particular point of time. These histories are saved via git commit command. Developers use git to track all the changes made by them or their team over time.
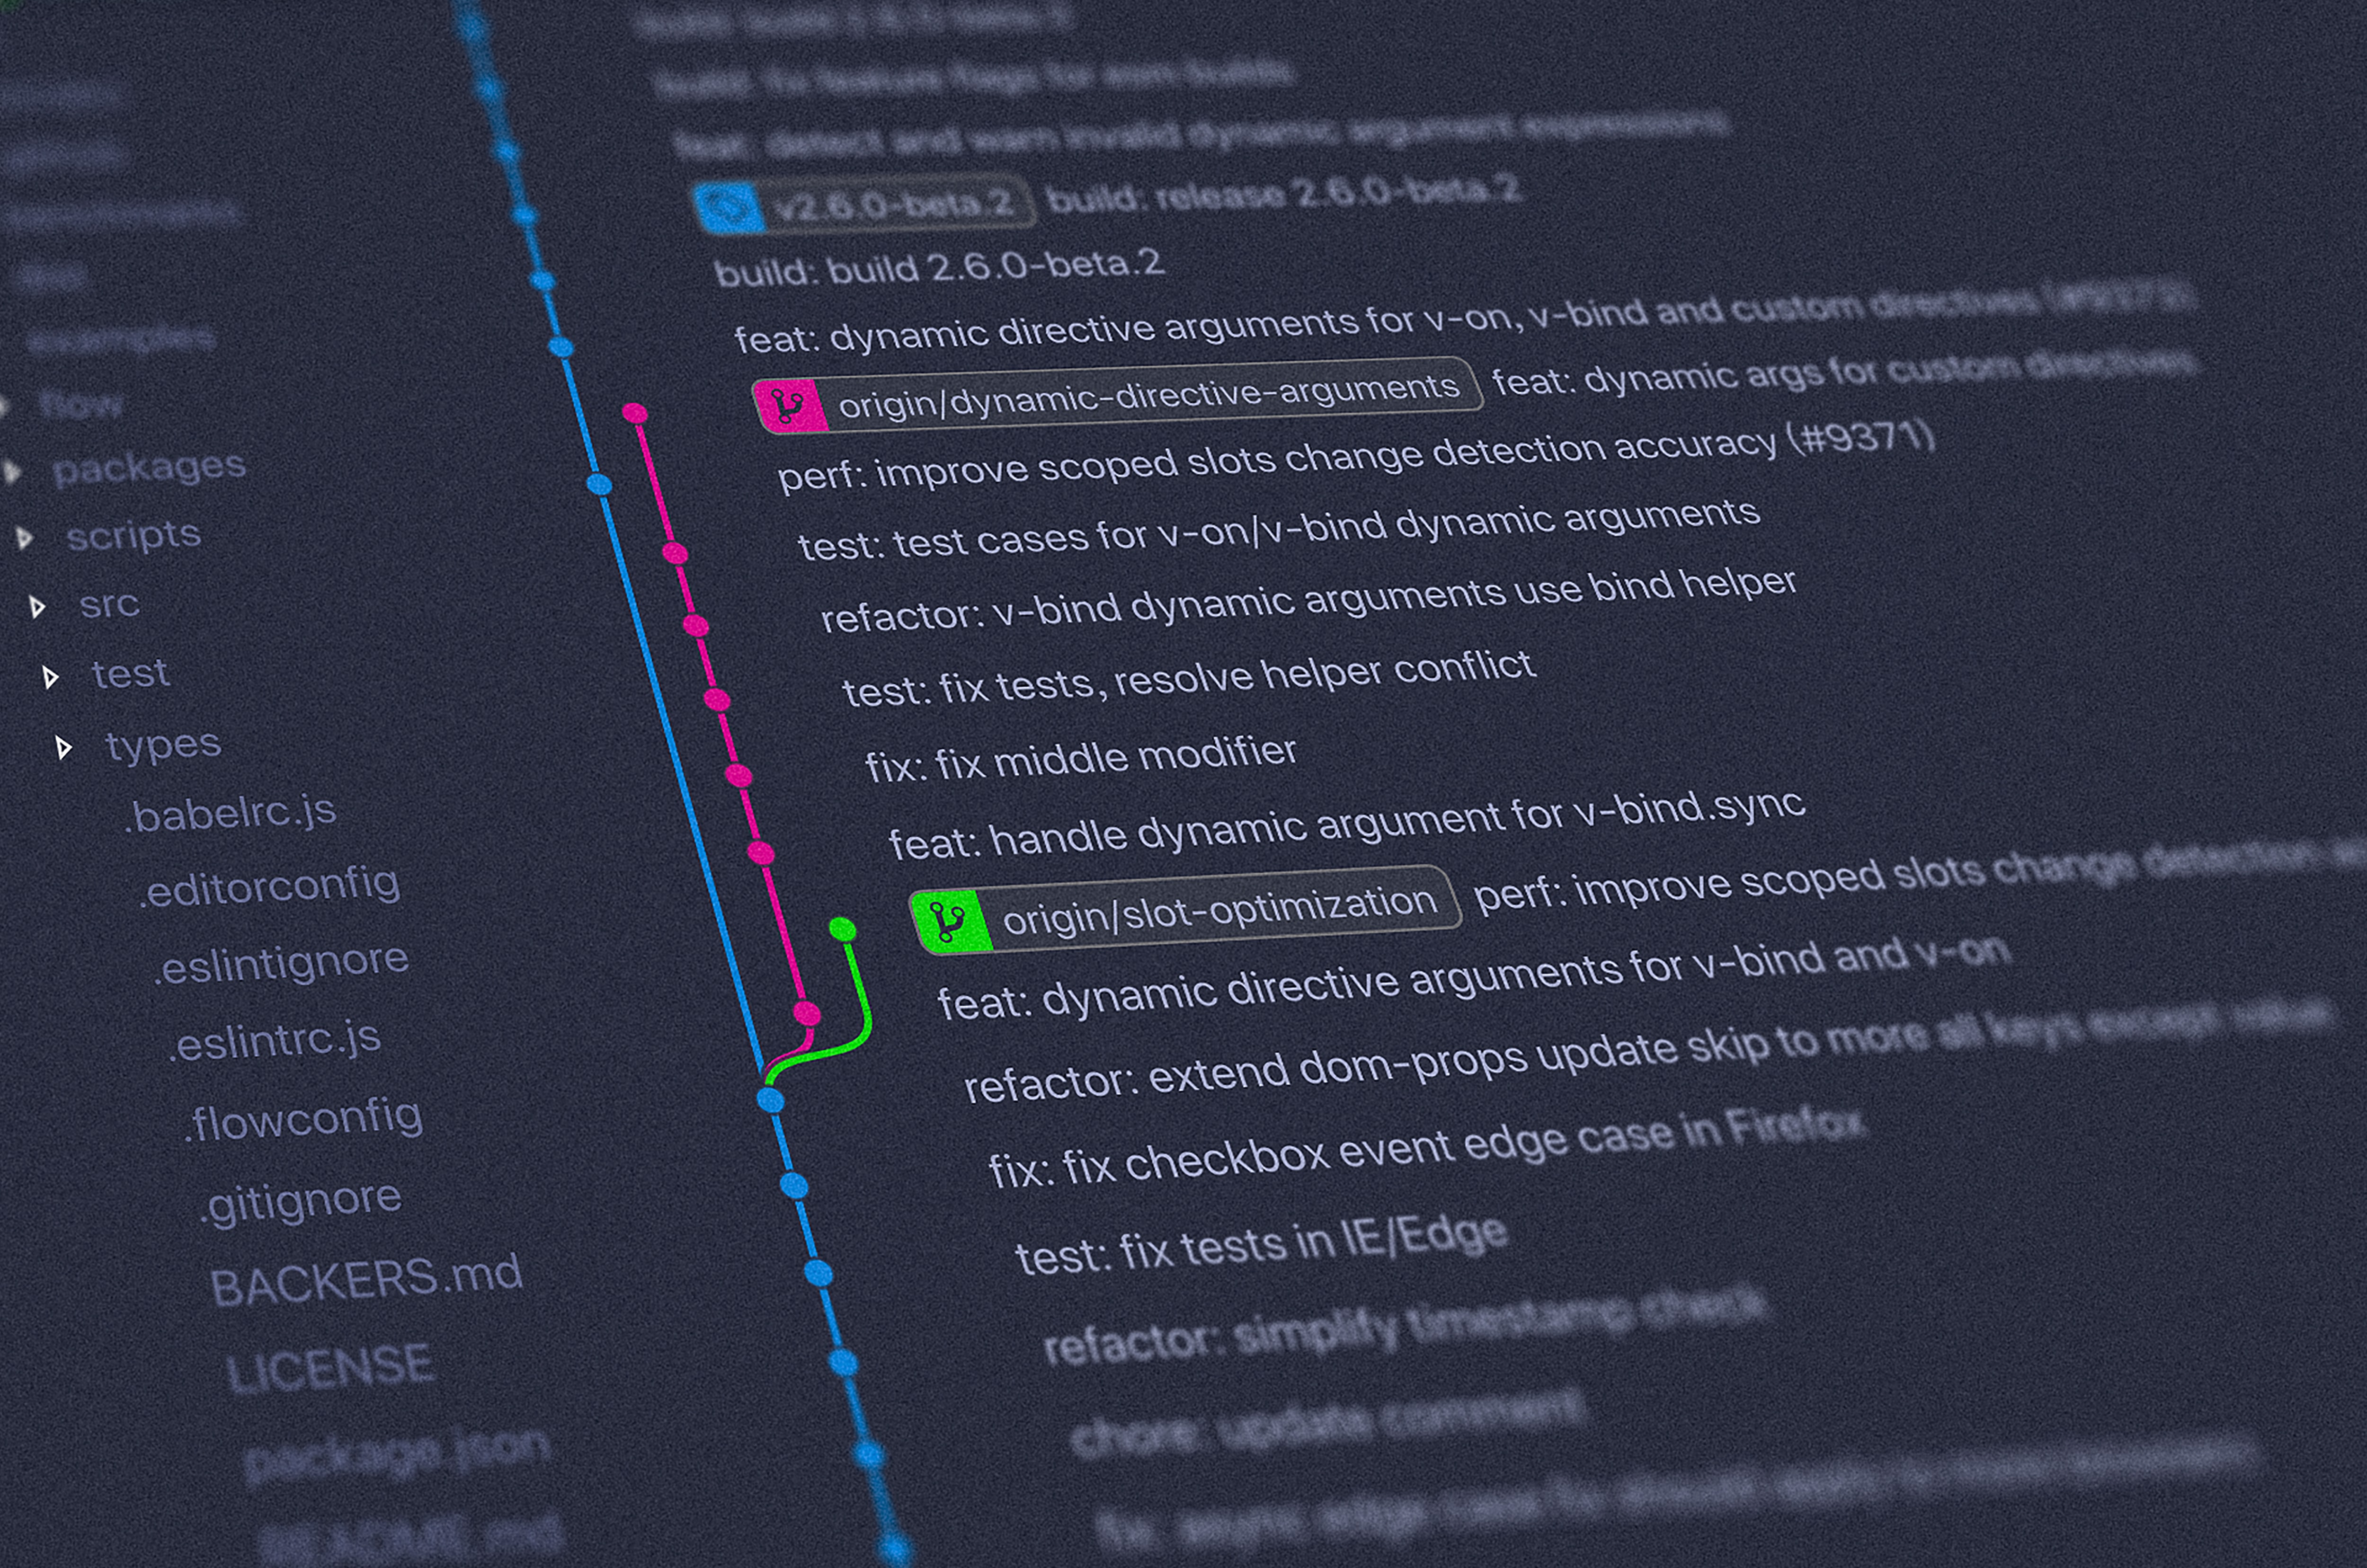
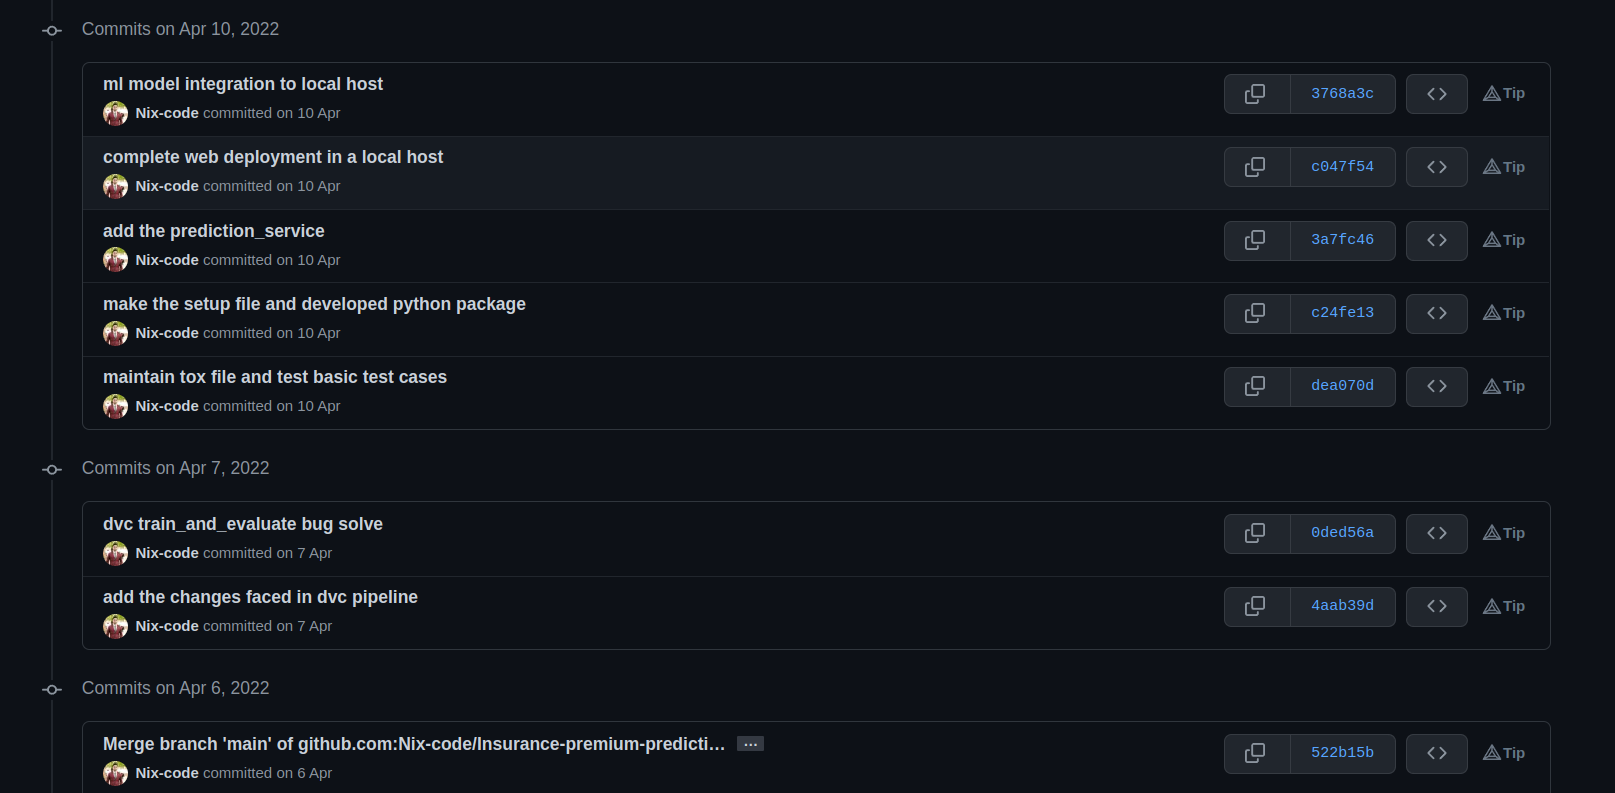
It also allows them to see who made what changes at what time. It shows the entire history of changes made in the past. Git is also very famous in open source softwares as all the developers around the world collaborate in a single project. Please, see the image below which contains the information about when and who made the changes in what date.
GitHub Overview
GitHub is an Internet hosting service for software development and version control using Git. It provides the distributed version control of Git plus access control, bug tracking, software feature requests, task management, continuous integration, and wikis for every project. (wikipedia)
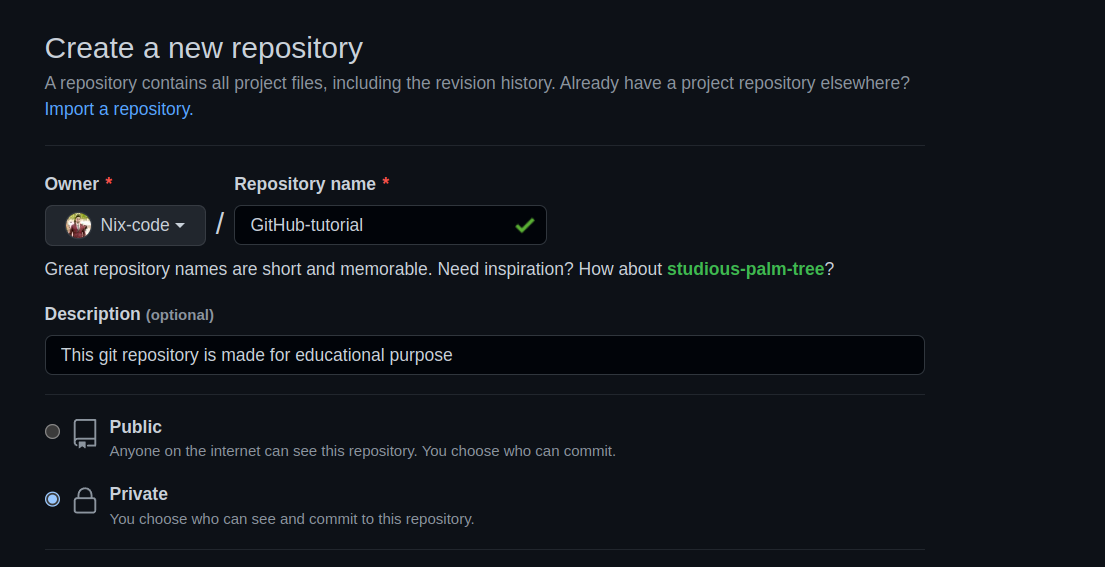
Simply, GitHub is a platform which allows us to host a git repository. Git repository tracks and saves the history of all changes made to the files in a Git project. It saves this data in a directory called .git , also known as the repository folder. Git uses a version control system to track all changes made to the project and save them in the repository. It is simply a folder where the entire project is saved. Below is the demonstration of creation of Git repository using GitHub.
To create a Git repository, visit GitHub and go to the repository section and create a new repository.
I assume you have installed git in your system. I am using the unix operating system for this tutorial. You can install git from any operating system and it’s free.
After creating the git repository. Let’s make some changes and save some files and see the history that I have mentioned before.
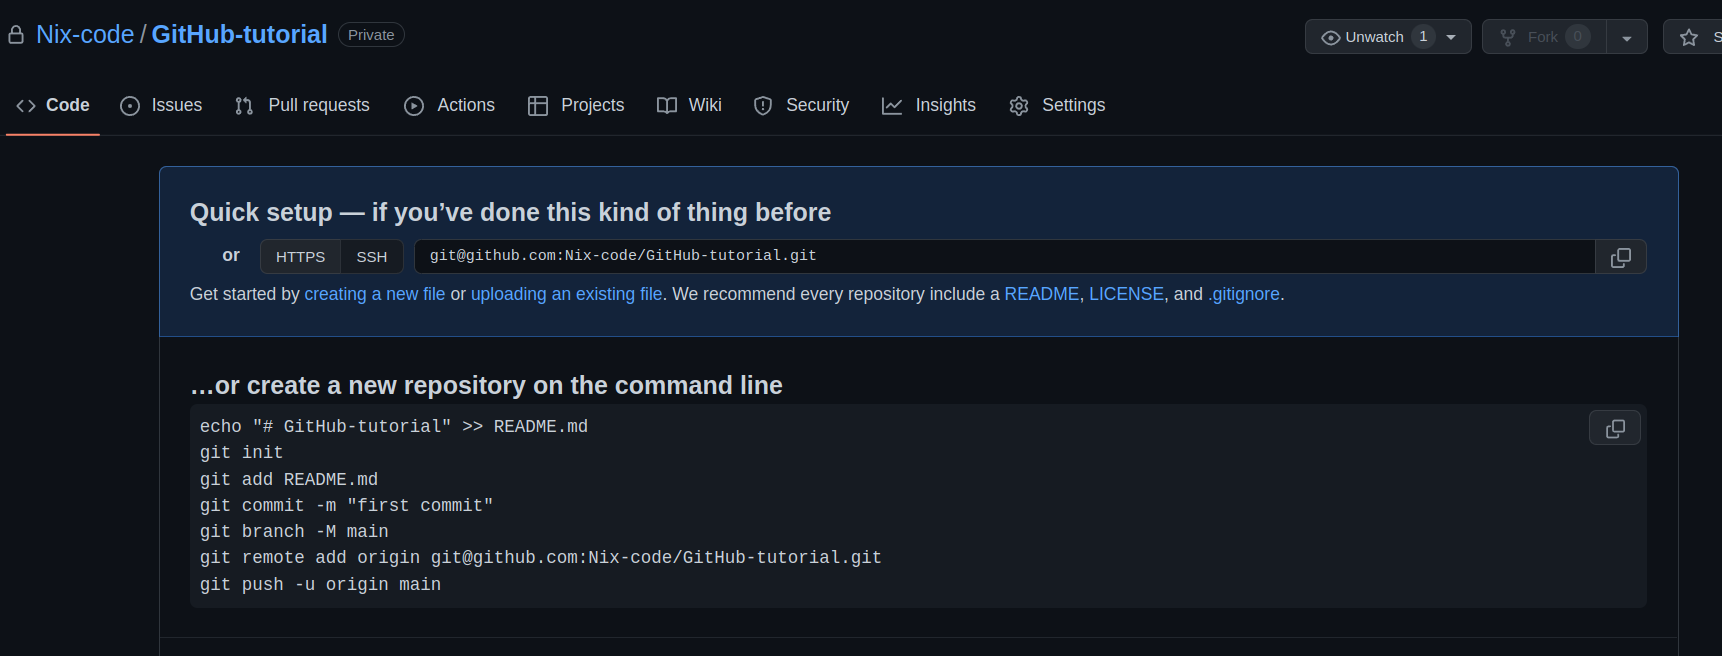
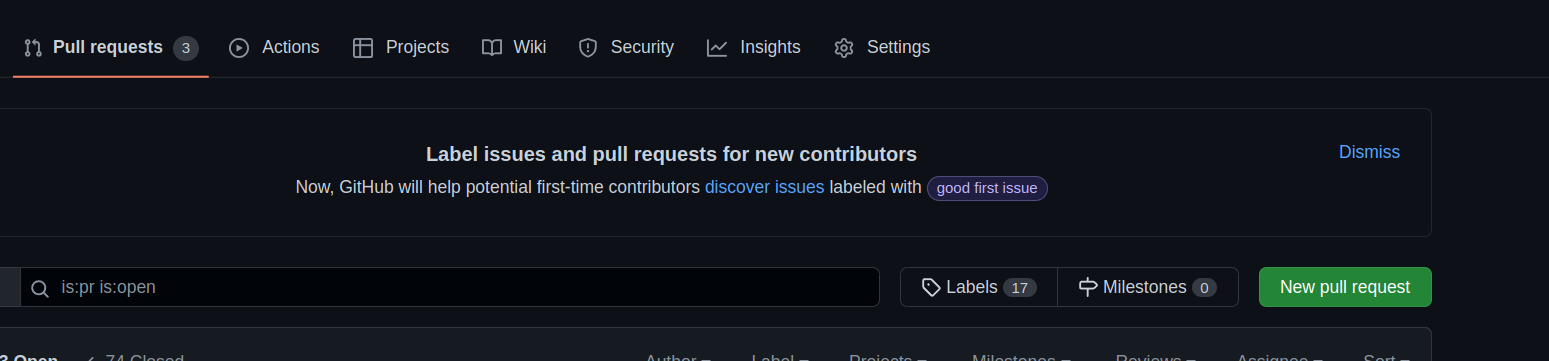
We have created a git repository named “Github-tutorial”. We will see everything mentioned there like the commands, SSH, HTTPS, Fork, Pull requests , Issues , Settings and many more.
Now create a folder in your local system as GitHub-tutorial. Let’s learn along with writing some hands-on commands.
git init
Now, it will assign an empty git repository in your local directory(folder). All the histories, changes and everything is managed by the .git folder which is a hidden folder and it will get generated the moment you initialise the git repository. The .git folder contains all information that is necessary for the project and all information relating commits, remote repository address, etc. It also contains a log that stores the commit history. This log can help you to roll back to the desired version of the code.
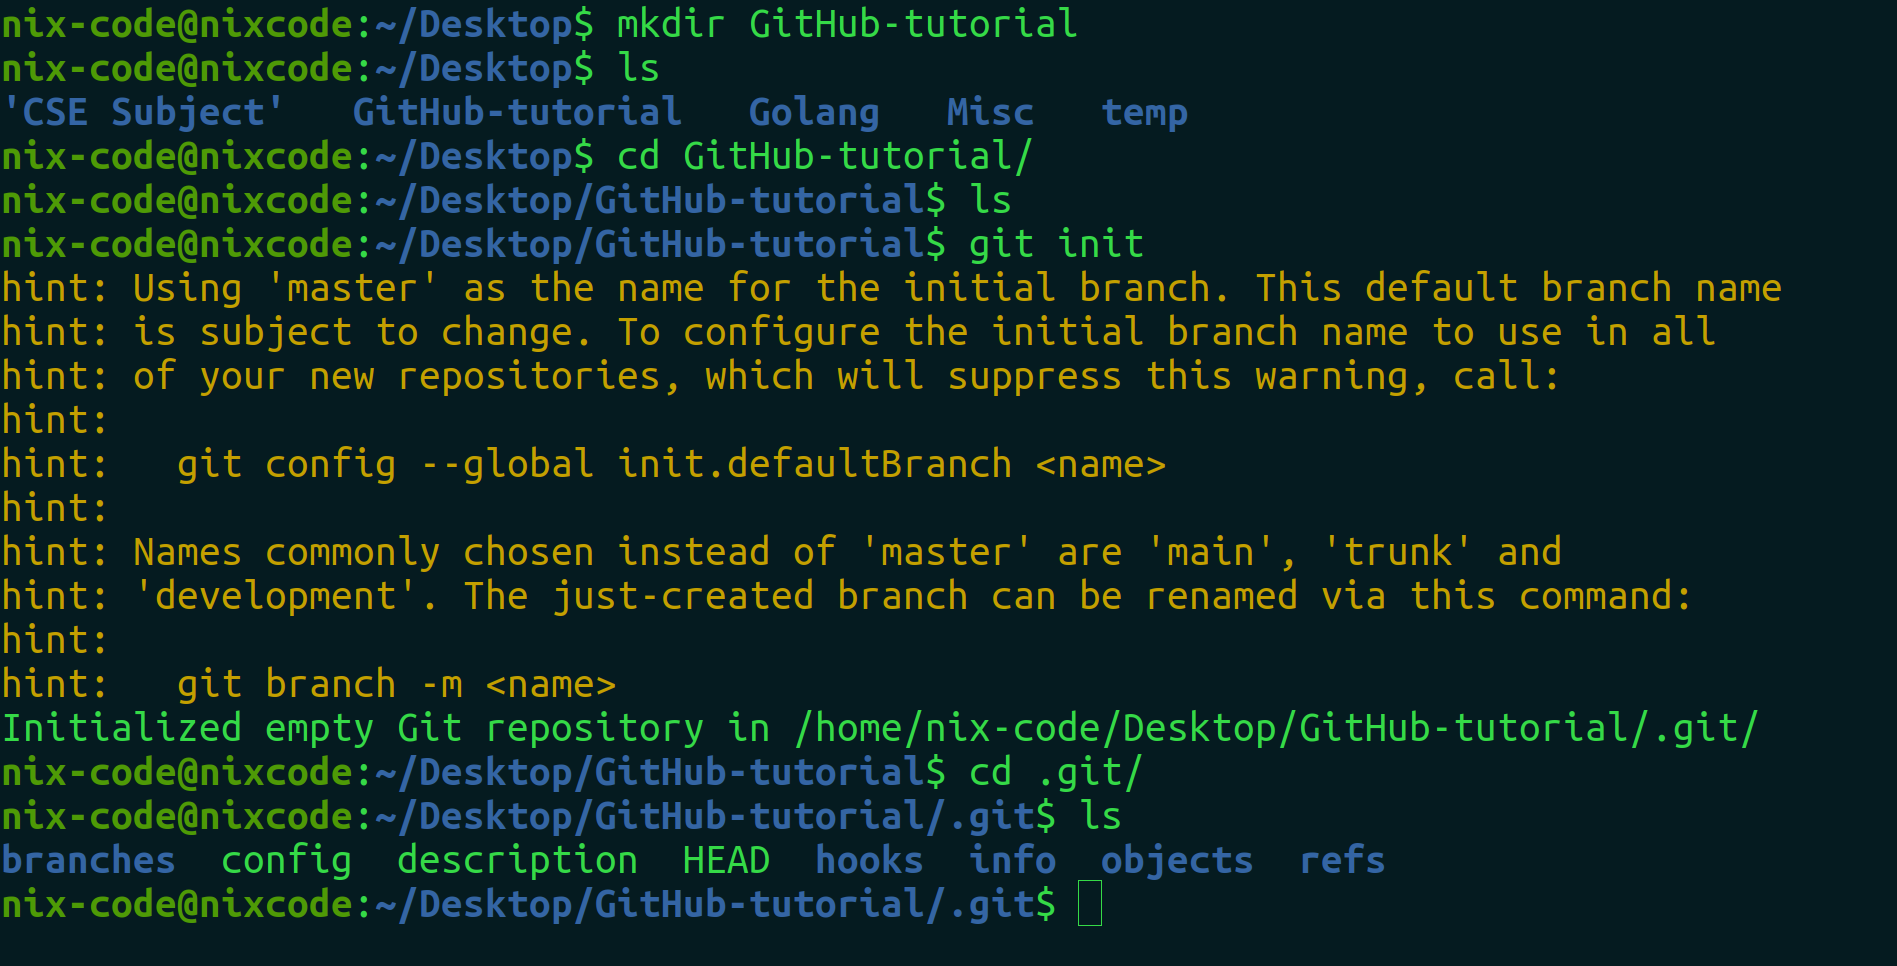
We will see basic linux commands in the next blog about Linux. So, if you don’t know about mkdir, ls, no need to get worried you can create a folder manually too.
The .git folder will contain details of every single change made to the code base. All snapshots of the modifications will be recorded in this folder like a database, which makes it possible to undo the changes and rollback to the desired version of the code.
The .git folder is hidden to prevent accidental deletion or modification of the folder. The version history of the code base will be lost if this folder is deleted. This means, we will not be able to rollback changes made to the code in future.
Let’s see what individual component does inside the .git directory
hooks − This folder contains script files. Git hooks are the scripts that are executed before or after events like commit, push etc.
objects − This folder represents an object database of Git.
- config − This is the local configuration file.
refs − This folder stores information about tags and branches.
HEAD − This file stores reference to the current branch. It points to the master branch by default.
- index − This is a binary file and stores staging information (~tutorials point)
Let’s understand some of the git commands and how it helps in version controlling.

Here, we created a file and wrote “Hi people” inside it. After that we wrote the command “git status”, and we saw random_text.md in red color. The file is now an untracked file. If the file is untracked , no one knows whether it has been created by someone or not.
untracked files are the ones still not versioned—”tracked”—by Git. This is the state of new files you add to your repository. That basically means Git is aware the file exists, but still hasn’t saved it in its internal database.
To add untracked files in its internal database or say to version it, we use the “git add “ command.
Git status
The git status command displays the state of the working directory and the staging area. It lets you see which changes have been staged, which haven't, and which files aren't being tracked by Git.
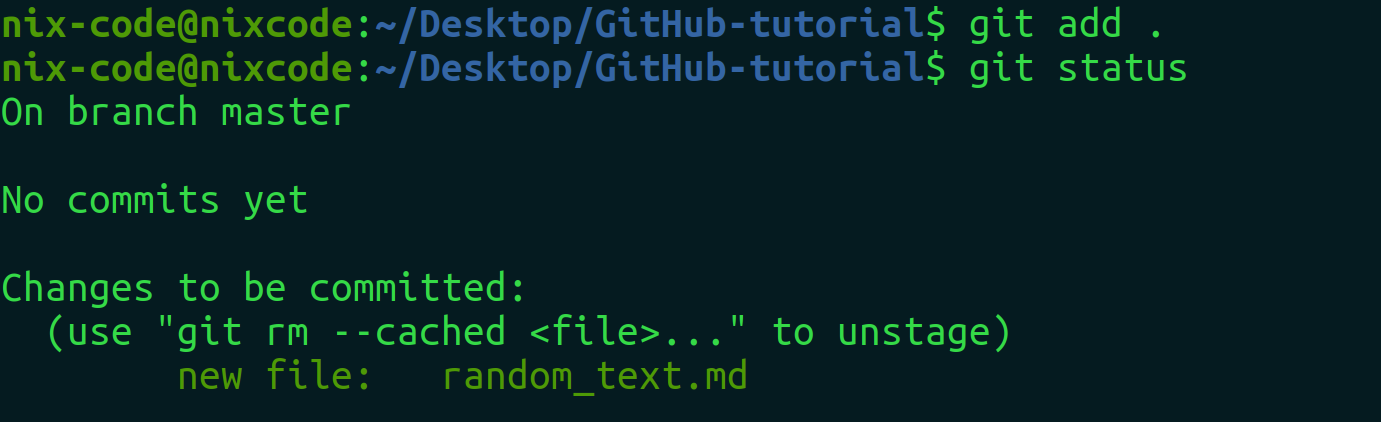
Now the file has been staged, versioned or tracked by git. You see the random_text.md in green colour now. “git add .” means to save every untracked file present in a current directory. Don’t worry if you don’t know about branch, master, commits , git rm – cached , we will explore them shortly.
Command sample till now
// initialise an empty repository
git init
// make a new file using command
touch random_text.md
// append the content in a file
echo "Hi people" >> random_text.md
// displays the state of the working directory and the staging area.
git status
// track the untracked files of current working directory
git add .
// displays the state of the working directory and the staging area.
git status
Git Commit
Git commit is the way of saving the history of the progress with a message.The git commit command captures a snapshot of the project’s currently staged changes. The commits are not changed/ deleted until and unless it is forced to.
git commit -m ":tada: add messages"
-m means message acronym.
Note: you can also add different emojis in your git commit. Refer this
Commit message:
git commit -m ":tada: add messages"


Create Mode: - Tells about permissions given to that file, i.e., File permissions. Here, 100644 means the file is a normal file.
Only 1 file is changed i.e random_text.md 1 insertion(+): 1 line is added to the file.
Note: Sometimes, we accidentally tracked the file which should be kept untracked. So, to restore it back from tracked to untracked. We use the restore command.
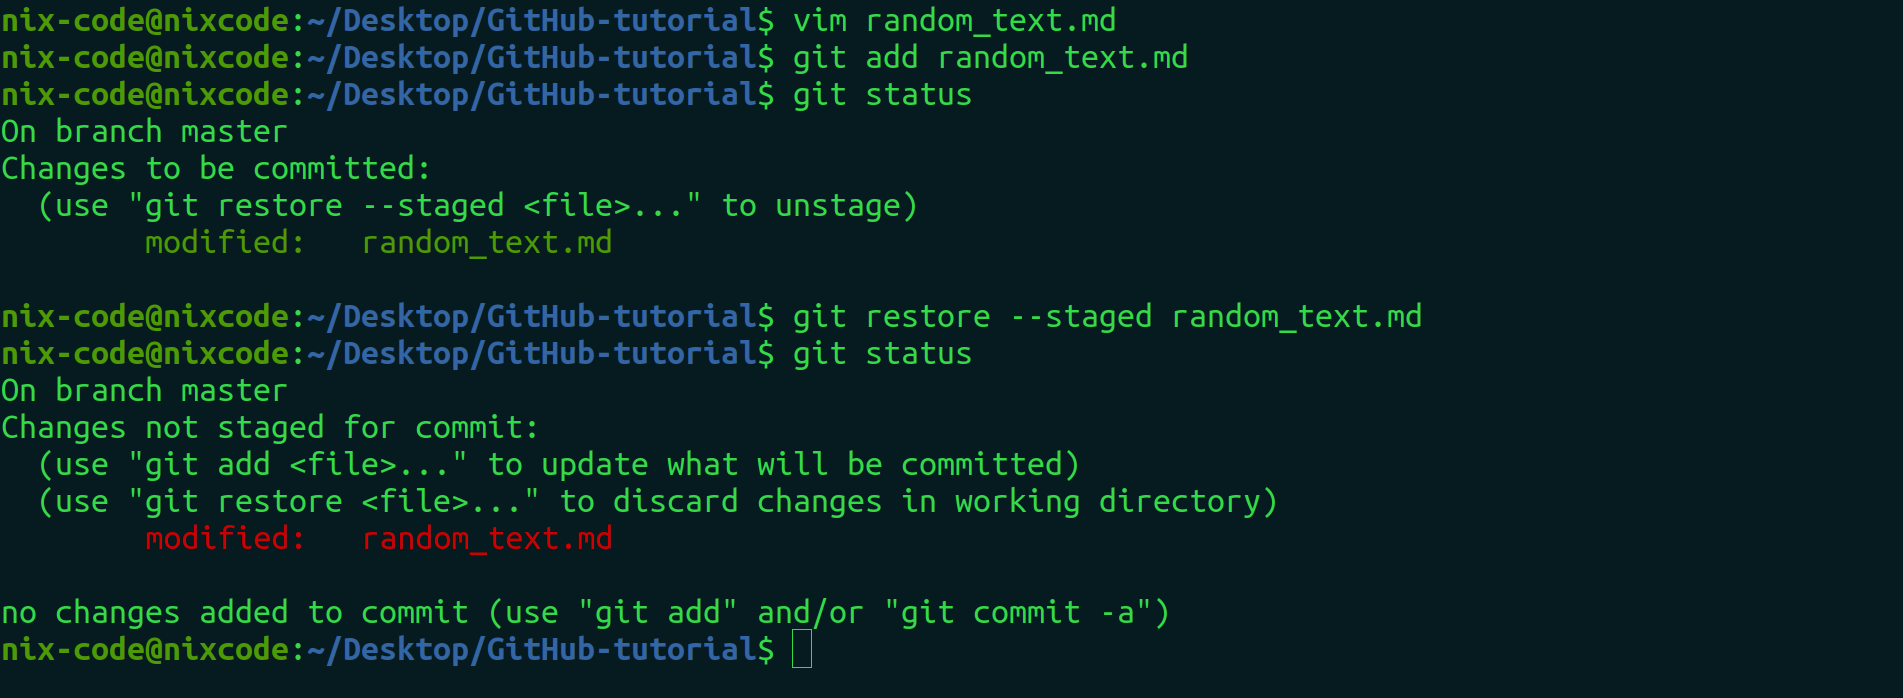
git restore --staged random_text.md
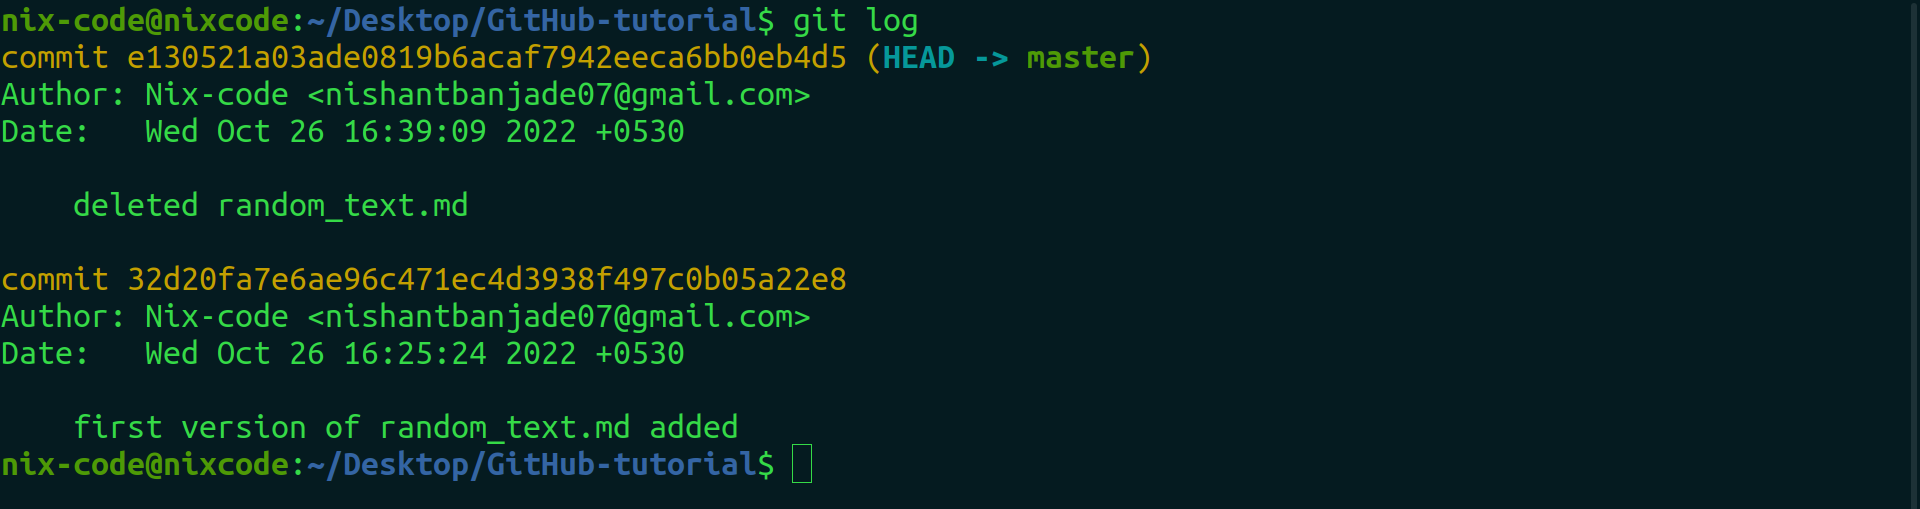
To see the history of commits of your project and who and when it was done, use log command.
git log

32d20fa7e… is the hash value of the commit that stores information about the commits and version at that point of time.
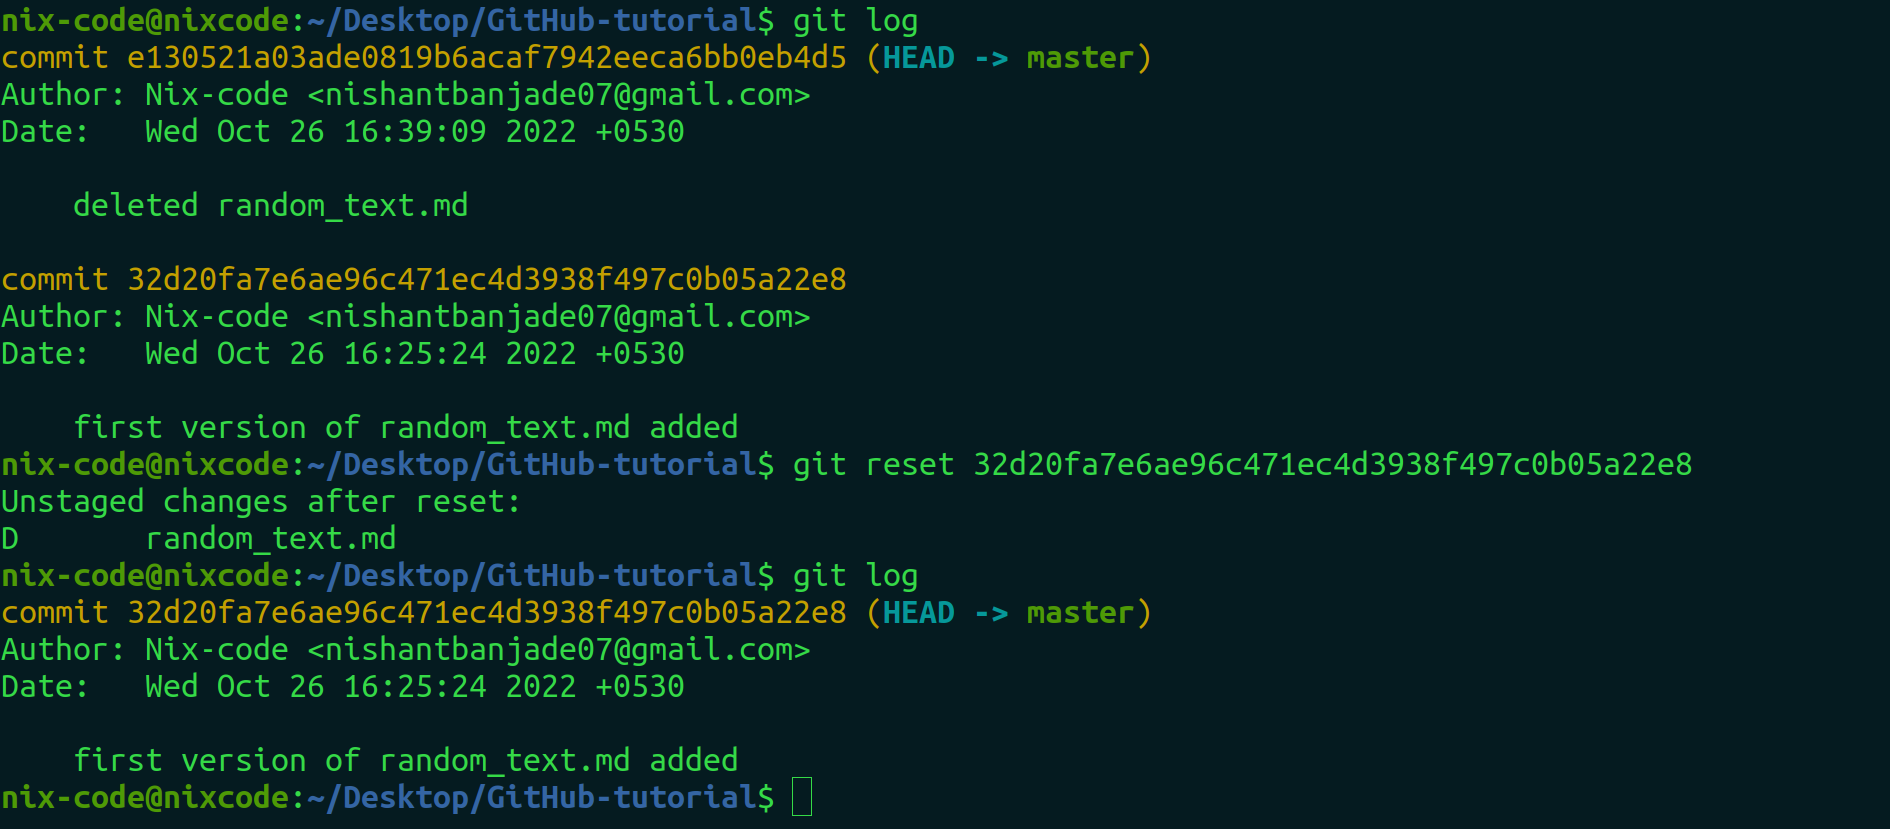
Say, accidentally you deleted a file which was very necessary with a commit too. Now, the file gets deleted but the history gets reflected in a log as seen below. In the first log, the commit of deleted random_text.md is reflected.
Now to delete this log and to get our deleted file back. We have to use the below mentioned steps.
- Type git log and see the logs.
- Copy the hash code of the log just below the log of the deleted file. In our case the hash code of the log just below the log of the deleted file starts with 32d20f…
- Use git reset . If you check the git log now, the history will be erased.
- Now, to restore the deleted file and make it untracked, you can use the git restore command as mentioned below.
In the above example, we restored the tracked file but in most of the cases you can also try doing stashing. Let’s understand it.
Git Stash
Say you are working on a project and you want to try out something new with a clean code base, in this case you don’t want to commit or save the history of your work. For this, you use stash in git.It is used to make all the changes somewhere else without making a commit and history. So, after finalising the task, we can get back this work and commit in any branch. We’ll talk about branch later.
For example: You made some changes in a file for some modifications. You are not sure whether your project manager will allow these modifications or not. So, you can’t commit it in a main branch but also you think this is a really cool feature so you can’t get rid of these modifications too. So, you can use stash for this.
Stash will keep history of changes without even committing. Thus, in future you can get the changes/ modifications back or delete it.
Stashing takes the messy state of your working directory, and temporarily saves it for further use. The git stash command enables you to switch branches without committing the current branch.
touch blog.txt code.txt image.txt
git add .
git stash
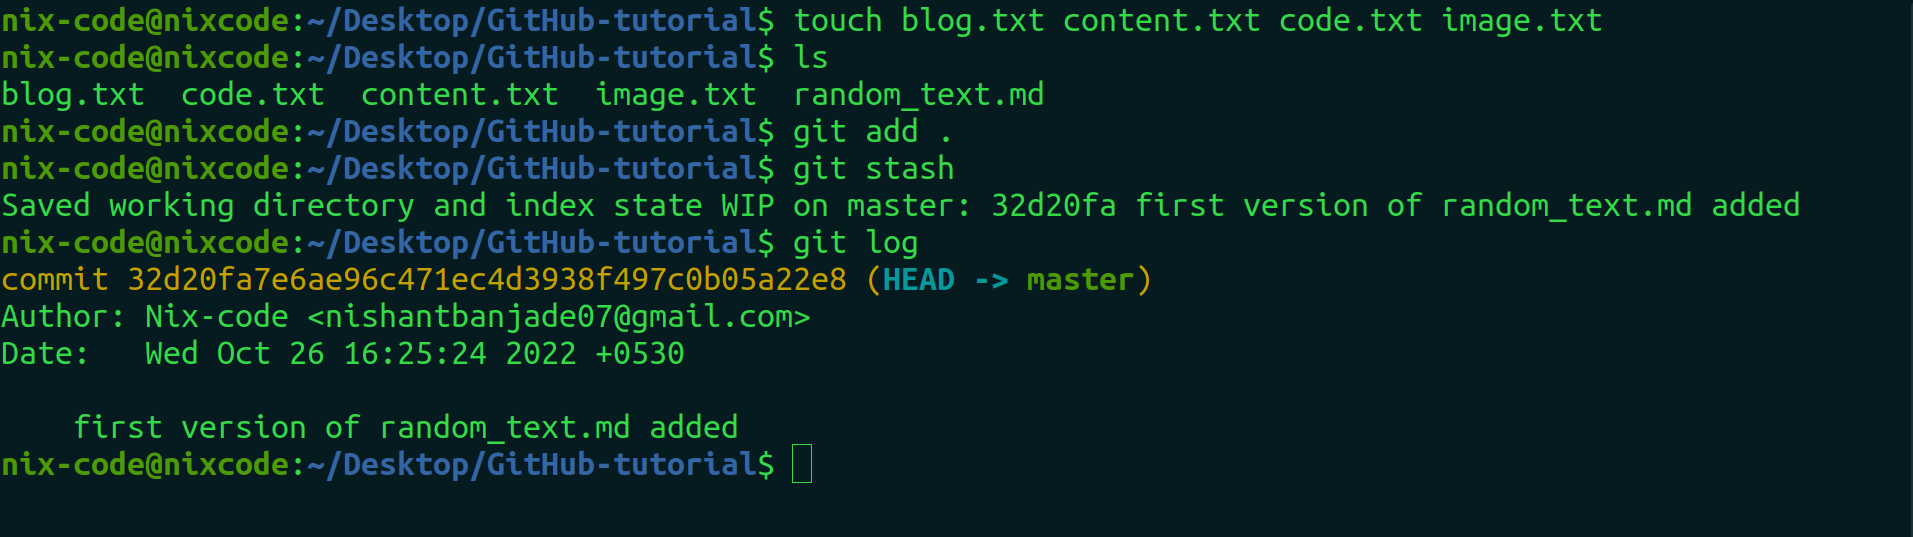
You can observe after using stash, there are no logs about that tracked files. So you can get back the hidden state of files back from the stashed place.
git stash pop

In order to delete the stashed files. You can see nothing after you write the git status command.
git stash clear

Git Remote
While working in a project as a team, there consists of a centralised repository where the owner or the ones who have the access to the centralised repository can review the others code contribution and merge their contribution if their work matches their code of conduct or principles.
So, other contributors contain a copy of the centralised repository. The copying of the centralised repo into your local system is done via Fork.
After forking, you need to clone their project into your local system. So, the clone is possible due to the remote URL.
The git remote command is one piece of the broader system which is responsible for syncing changes.
The git remote command lets you create, view, and delete connections to other repositories. Remote connections are more like bookmarks rather than direct links into other repositories. Instead of providing real-time access to another repository, they serve as convenient names that can be used to reference a not-so-convenient URL. (reference : atlassian)
Git supports many ways to reference a remote repository. Two ways to access a remote repository are using the HTTP and SSH method. For read-only access to the repository, you should use HTTP and for read-write access, should use SSH protocol.

You need to configure ssh in your local system for git in order to make it work. The command for remote access is:
git remote add origin git@github.com:Nix-code/GitHub-tutorial.git
let’s break down the command.
remote - URL “the place where your code is stored.” That URL could be your repository on GitHub, or another user’s fork(we’ll discuss afterwards), or even on a completely different server.
add - It adds the URL
origin - Origin of the URL
Now , git referenced a remote repository using SSH. You can get this code right after you create a new repository. Now, you are ready to push your changes in gitHub.

You can push via command line and the changes get reflected in a website.

git push origin <branch_name>
If you check in your repository in the website, you can see all those files in a git repository online.

Now, your project is pushed to GitHub using Git version control.
Let’s Learn about some more concepts.
Clone: In general terms, clone means to make a deep copy of something. Same in git, we use clone command to copy the entire repository of others in our local system.
Copy the SSH code of your project and just do the steps shown in the figure.
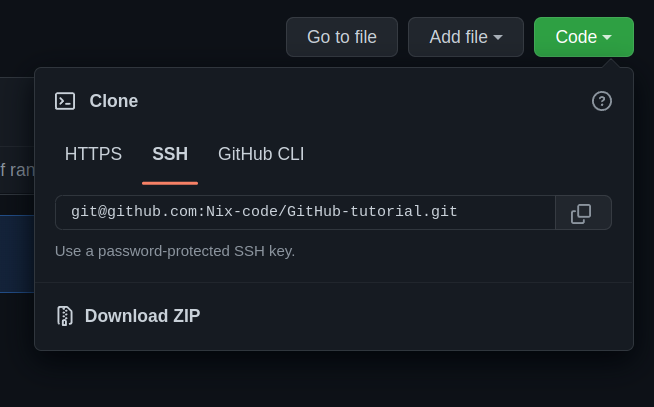
After this use clone command in git.
git clone <SSH-URL>
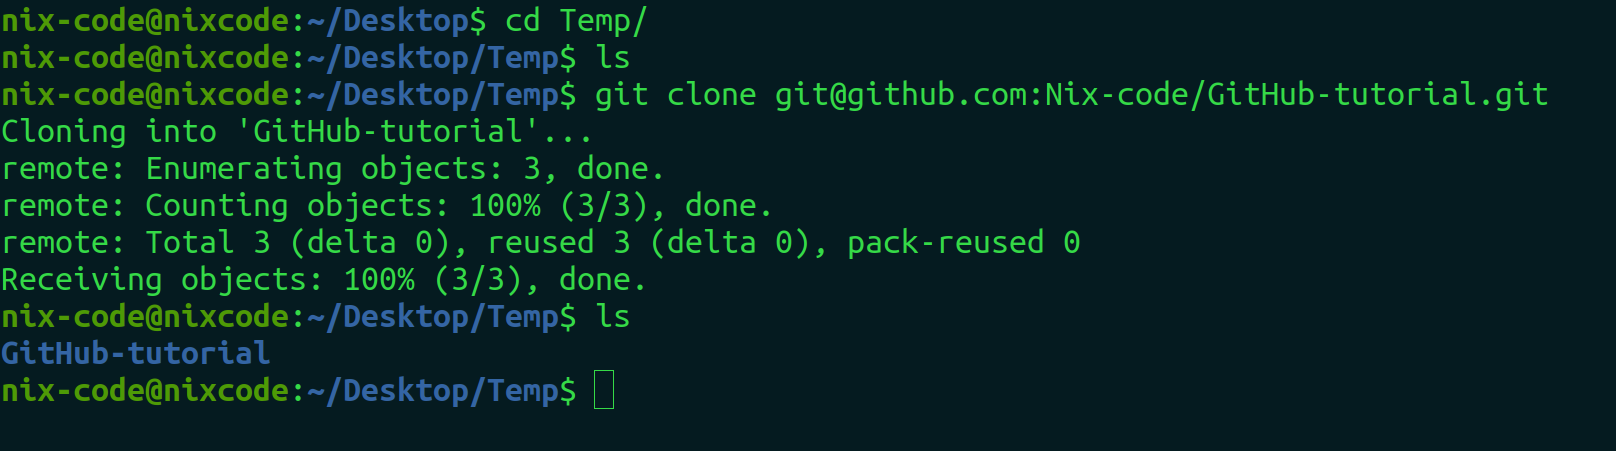
As shown in the figure, the entire git repository is copied into your local repository. Cloning is useful when you want to see how others' code works in your system and it is also useful when you are contributing to other people’s repositories.
Fork | Pull Request and Merge
Fork is similar to clone but instead of copying the other’s repository in a local directory, it copies the repository in a server. So, whenever you fork other’s repository, it is visible as a copy in your gitHub repository. After forking, you get your own unique SSH and HTTPS code of your copied repository. So, whenever you wish to make changes in forked repo, it won’t affect the main / centralised repo.
After fork, you need to clone the forked repository to make changes locally. After making complete modifications in the cloned repository, you make a Pull request to the owner of the main repository. The owner looks into your modification and if he/she thinks your modification is good enough , he/she merges your pull request and your contribution is visible in the main repository.
Fork Example

After fork, make a clone of this project in your local system using the git clone command. After making changes, make a Pull request.
Always make a pull request from your cloned repository. If you try to push directly in a centralized repo, it won’t work.
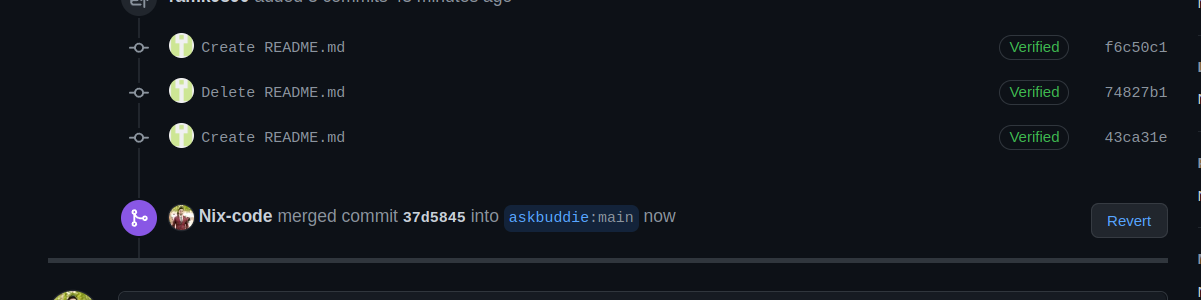
After your work is loved by the main project maintainer, it will get merged like this.
This is how open source software is made. In a centralised repository, a lot of developers around the world contribute and make the software better. Example of open source software is the Linux operating system.
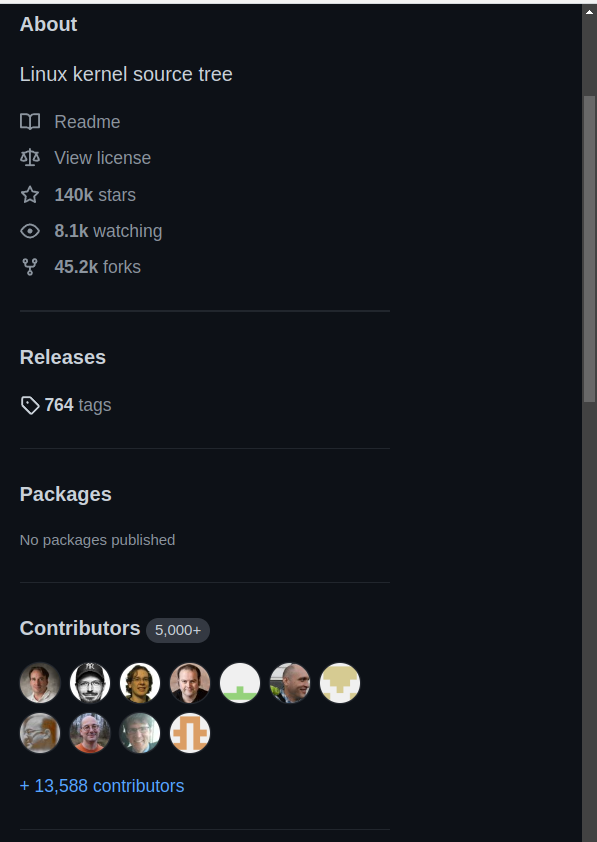
This is the repo of a Linux operating system. Let’s observe it carefully. Till now, 45.2K people have already forked this main repo, it means, they have copied this project in their gitHub server. Around 5000 + people have already contributed something to this project. If you successfully contribute anything to another’s repo and get merged by the maintainer, your identity will be shown in a contributor list. Hat’s off to these 5000+ developers who made the linux system so better till date free of cost.
In the future blog, we will see about branches, merge conflicts, rebase about GitHub License and many more.
I appreciate you if you have gone this far reading this blog. Thank you very much for your time. If you have learned something new today, comment your thoughts. This is my first blog post , feel free to tell me the issues you faced and area of improvements.
Git and GitHub | Part 2 is on the way
Topics will be covered
- Branch
- Rebase
- Merge conflicts
- Git hooks
- CI/CD with GitHub Actions
- Your suggestions
Socials
- Website: www.nishantbanjade.com.np
- GitHub:https://github.com/Nix-code
- LinkedIn: https://www.linkedin.com/in/nbanjade/
- Twitter: https://twitter.com/NishantBanjade1
References:
Wikipedia: https://en.wikipedia.org/wiki/Git
Atlassian: https://www.atlassian.com/git/tutorials/syncing#:~:text=The%20git%20remote%20add%20command,%22Repository%20URLs%22%20section%20below.
Tutorials point: https://www.tutorialspoint.com/what-is-git-folder-and-why-is-it-hidden#:~:text=git%20folder%20contains%20all%20information,creates%20an%20empty%20git%20repository.
Kunal Kushwaha : https://www.youtube.com/watch?v=apGV9Kg7ics (shout out)