Git and GitHub | Part 2
Complete tutorial on some advance stuffs like Branches, Pull request, Merge conflicts, Squashing, Rebase and more

Hi, I'm Nishant Banjade, a Software Engineer at Ellucian, committed to transforming education through technology. With expertise in developing CRM systems, plugins, workflows, APIs, and customized solutions for Higher Education, I bring a strong focus on innovation and efficiency. Currently, I'm honing my skills in full-stack software development, system design, data structures, algorithms, and Microsoft Dynamics 365.
I am a skilled software developer with expertise in C#/.NET, D365, JavaScript, TypeScript, ReactJS, SQL, and cloud technologies like AWS, along with experience in RabbitMQ, Docker, MUI, Tailwind, JIRA, and Git.
Introduction
Welcome back ! In case you haven’t seen part-1 of the Git and GitHub blog, please read it once because it is a bit advanced topic and complete beginners may feel some difficulties in understanding part 2 directly.
So, we were in the scenario where we needed to build a news portal from different places and we successfully collaborated with each other by the techniques of pull request, merge and fork concepts. But there are still many things to know when collaborating.
Let us think of one scenario. Say, you are trying to do a matrix problem in mathematics. So, I assume you first try to solve that problem in a rough notebook and if the answer gets satisfying, you write the solution properly in a math notebook.
Git Branch
The concept of branch is similar to the above scenario. Git Branch: All the code that is not finalised must be on a separate branch. So, the main branch is not affected.
Branches allow you to develop features, fix bugs, or safely experiment with new ideas in a contained area of your repository.
You may have seen master and main branch in our previous blog alot. After you create a git repository for the very first time by cloning it from a remote server , the repository has a default branch. The default branch is a master branch. “Master” is just a naming convention of the default branch. Is it different from the main branch? This is just a change of words. The default branch name changed from “master" to “main". You can still create a branch named “master".
It is always a good practice to create different branches and work until you get your work finalised. Do Not directly commit to the main branch.
Let’s work on a branch.
Branch Demonstration
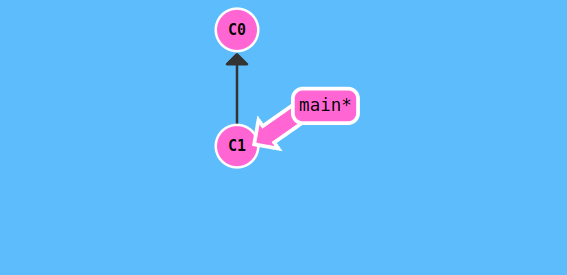
As in the figure, master/main is the default branch in a git. c0, c1, c2 are commits. The (*) is the notation for the current branch. This is also known as HEAD.
HEAD: Head is a pointer which says , all the new commits will be added on the HEAD.
Branch workflow
Initially, the default branch is main/master. If you commit something new to the main branch, the branch gets increased as shown in the figure below.

You can create a new branch with any name. To create a new branch, you have to write the following command.
git branch feature
To switch to a new branch(feature), you have to use the git checkout command.
git checkout feature

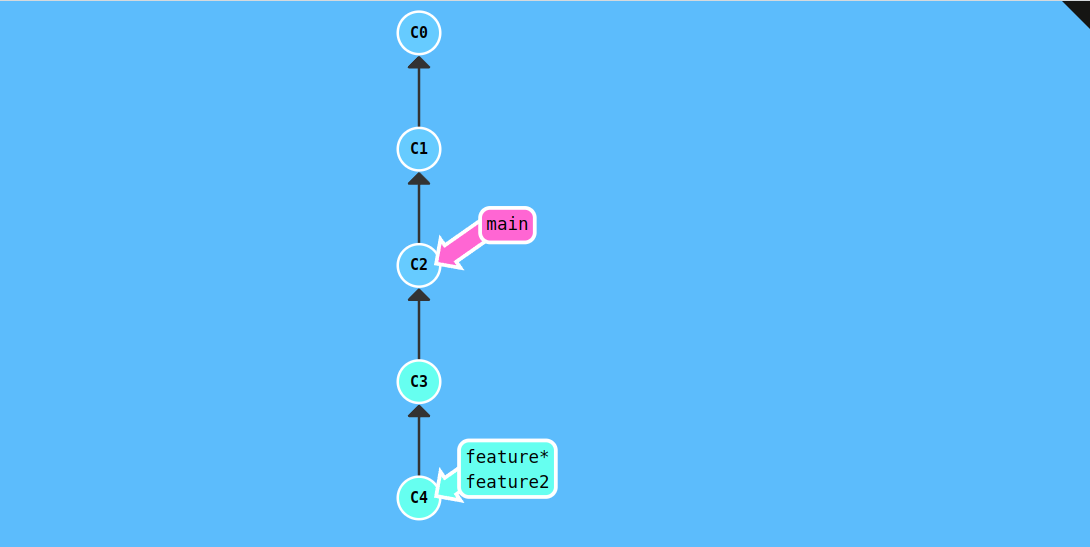
Now, see the (*) is pointing to a feature from main. Now HEAD points to feature. Every new commit now created will start from a feature.

Initially the main and feature branches were at c2. After we commit something new, new commits start from the feature. So, main is at c2 and features only moved forward to c3 and from c3 to c4.
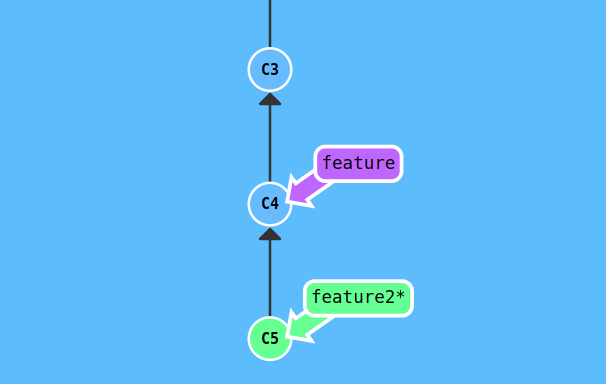
Again we created a new branch feature2. But our HEAD is pointing to a feature so c3 is the commit from the feature.
c4 commit is pointed by feature and c5 is now pointed by feature2. C5 is a new commit from feature2.
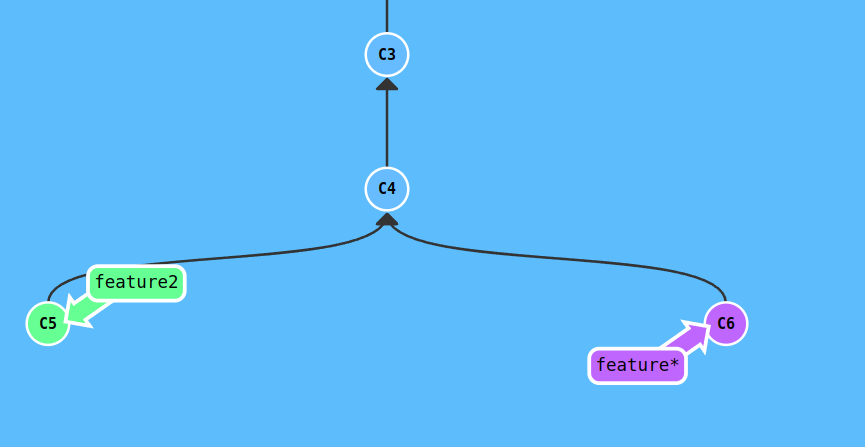
Now switch to feature again, and commit. The new commit begins from c4 which was the last commit done in the feature branch.
Play branching: https://learngitbranching.js.org/
Note: The commands used in the above demonstrations.
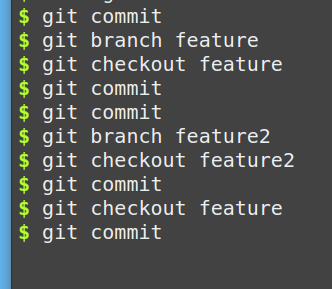
After you finish work in a feature branch, you can merge. Git merge will combine multiple sequences of commits into one unified history.
git checkout main
git merge feature
Git Pull request and Merge
Real merging of branches is done via pull request.
Suppose, you are working in a team of 100’s of devs around the world. Say, you want to add a simple feature in their central repository. For that you have to issue pull request as discussed earlier in part-1 too.
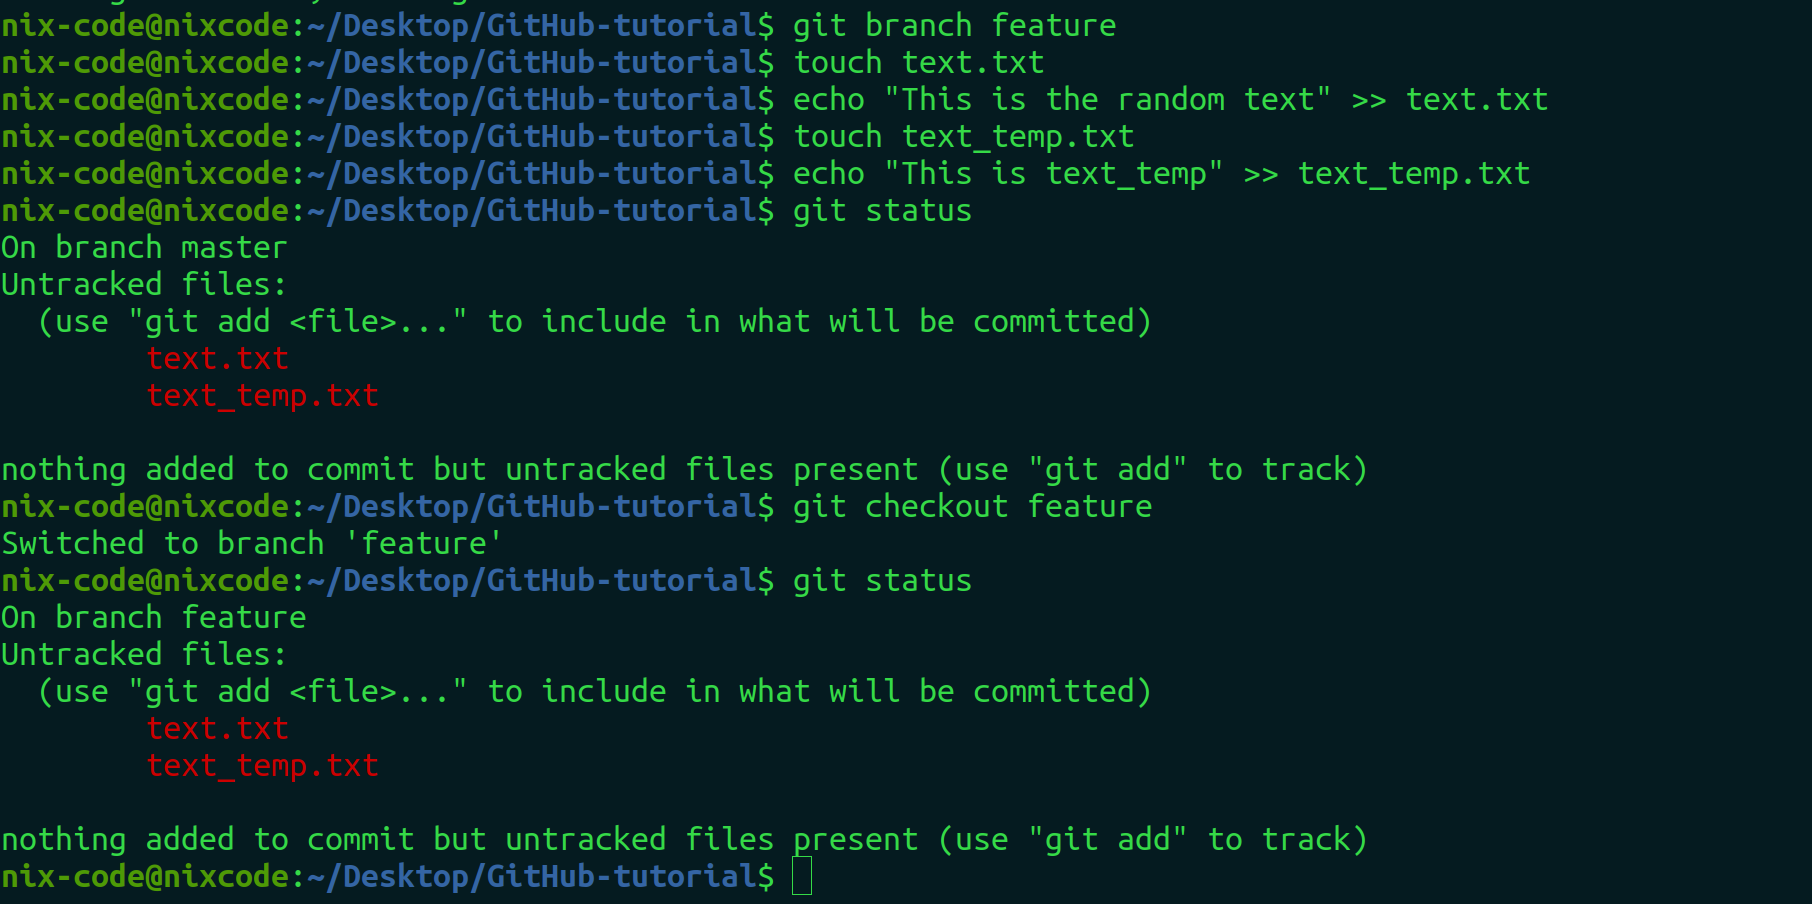
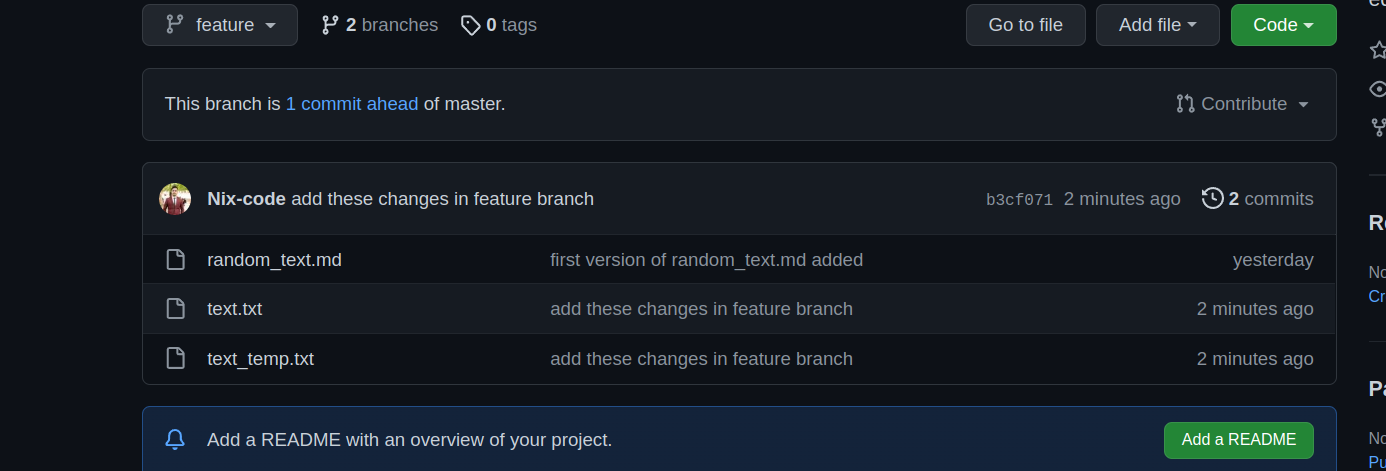
Let’s create a feature branch and create some files in it as shown in the figure.
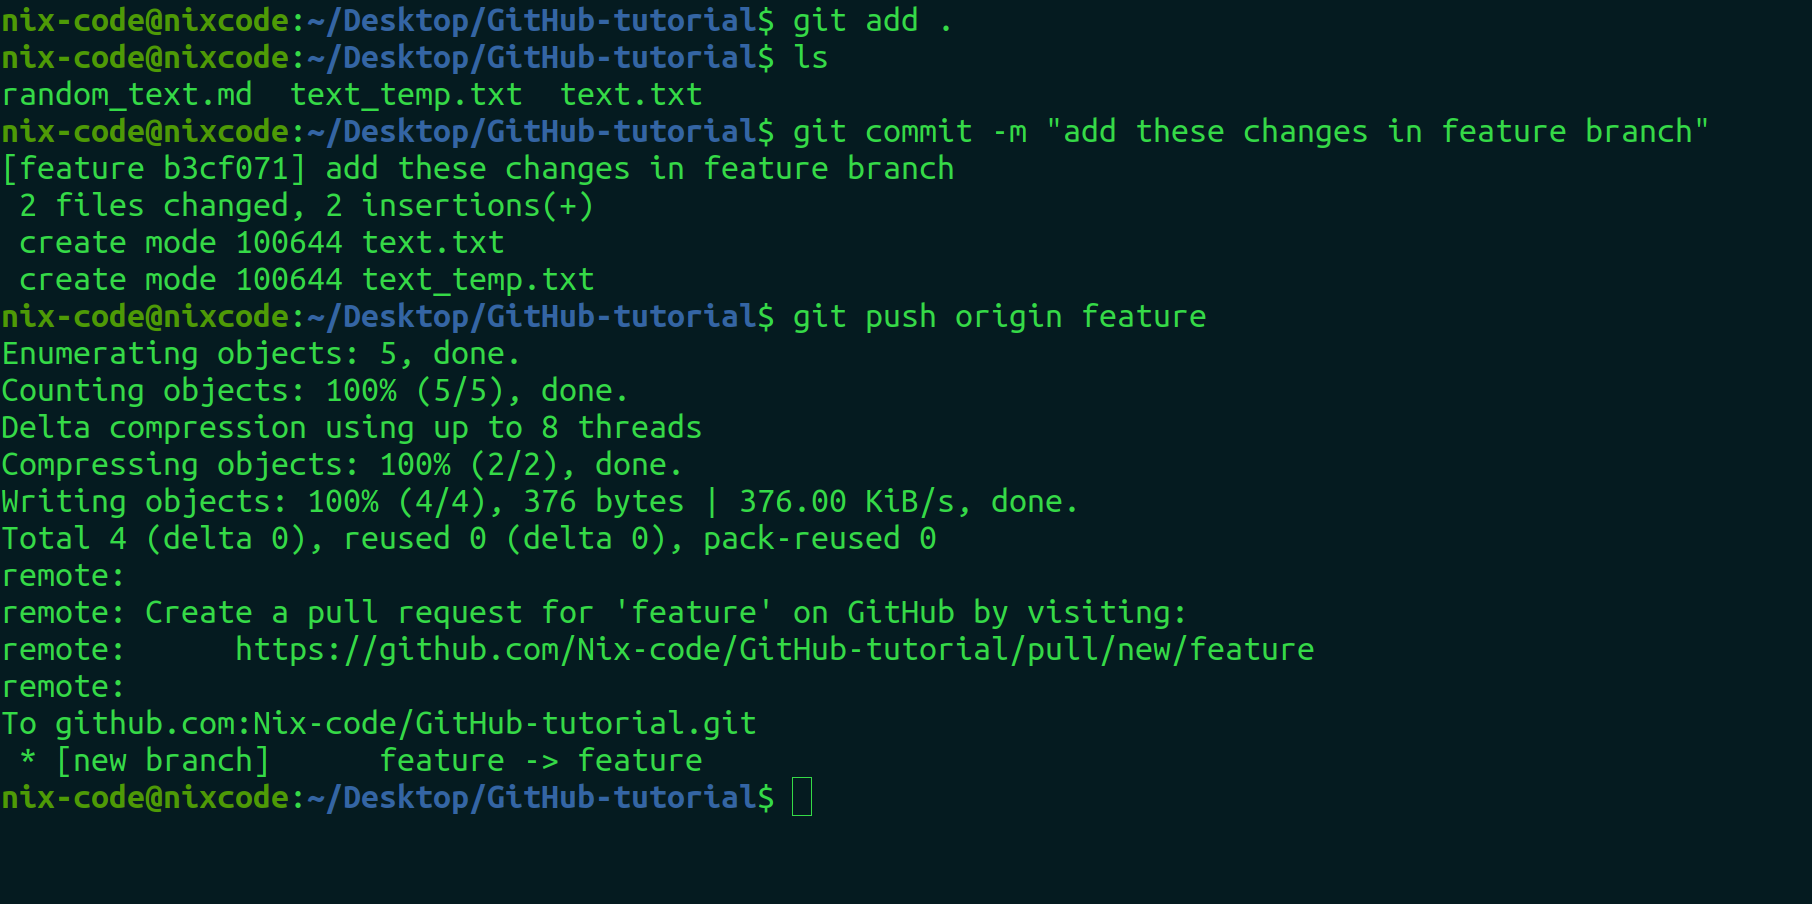
push the changes in the feature branch as shown in the figure below.
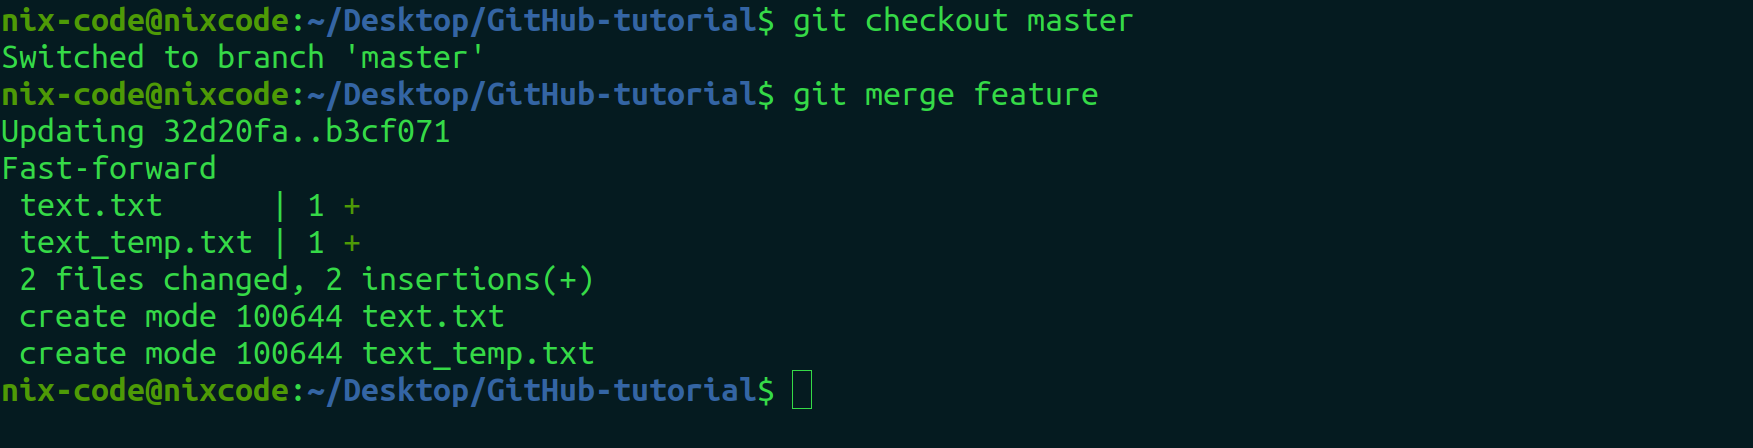
Merge the commits of feature branches in a master branch.
If you see the master branch, there is only random_text.md but there are many files in the feature branch.
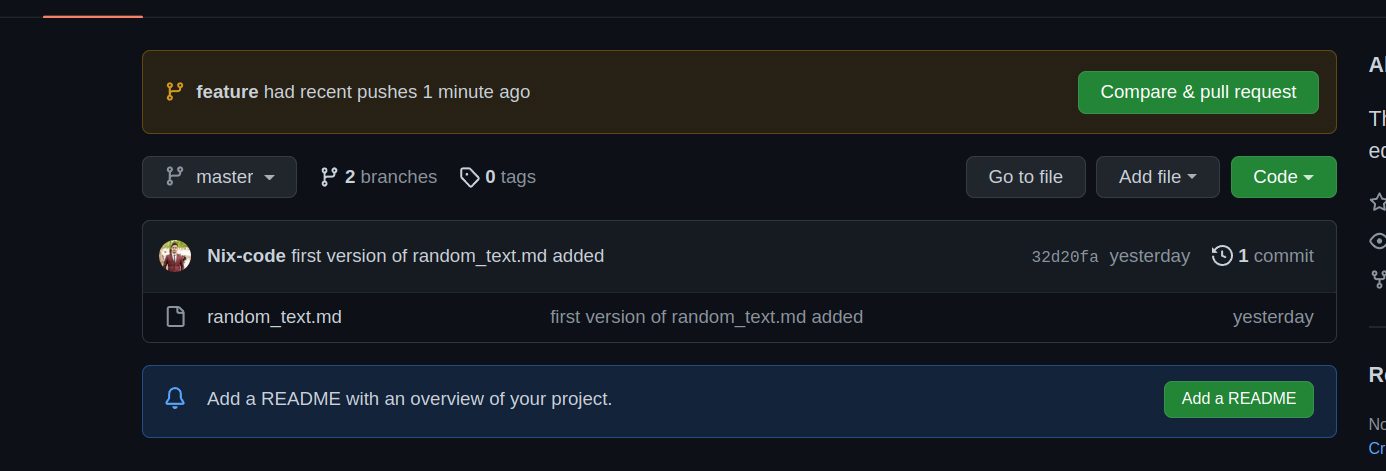
If you push something in the feature branch, you can only see the changes in the feature branch. To be able to see changes of feature branches in a main branch, you have to merge the branches.
you can do this via pull request and merge it in a master branch.

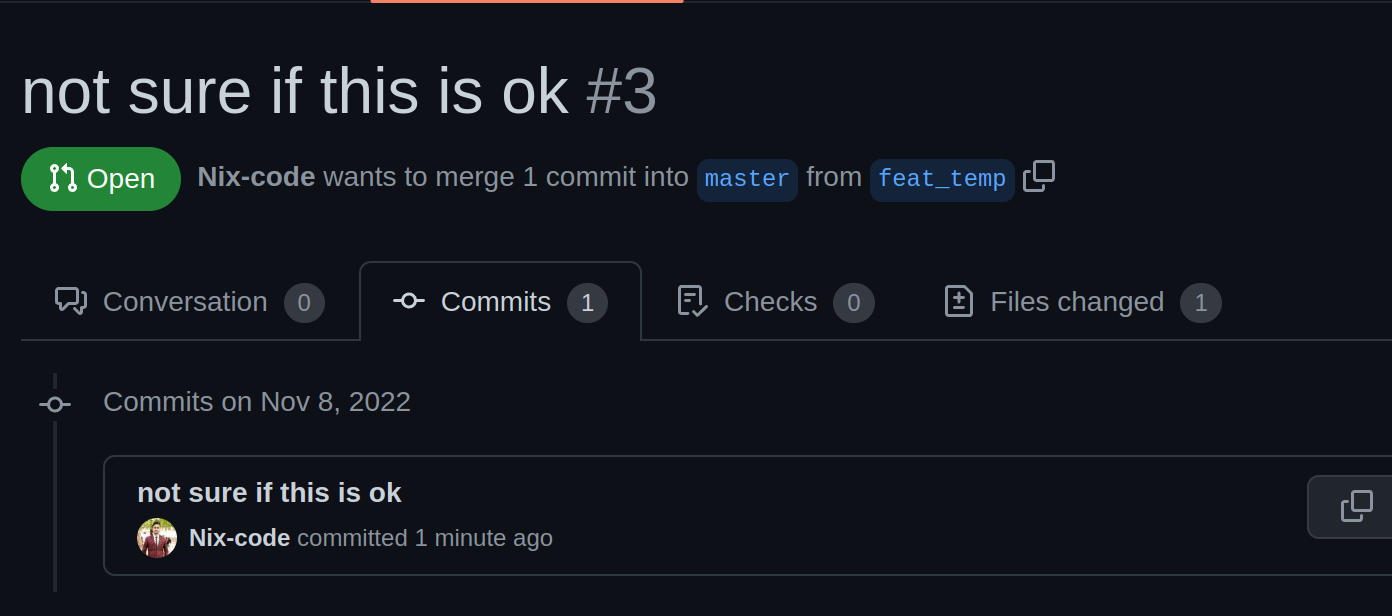
Removing a commit from the pull request by force pushing to it
Sometimes you may issue pull requests and later you realise the pull request was accidentally issued. As a beginner, you might panic because you don’t want your maintainer to see what you have committed along with a commit message. For this case, you can delete the commit from pull request using this technique.
See the previous log using
git log
Inside the logs you can see all of your changes and version history.
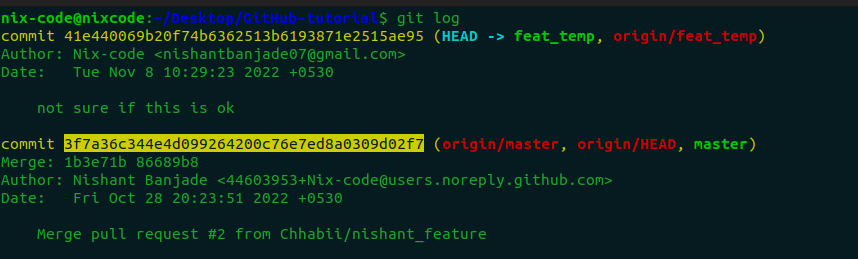
Now, reset/ delete the log. It is taught in the Part-1 of Git and GitHub tutorial.
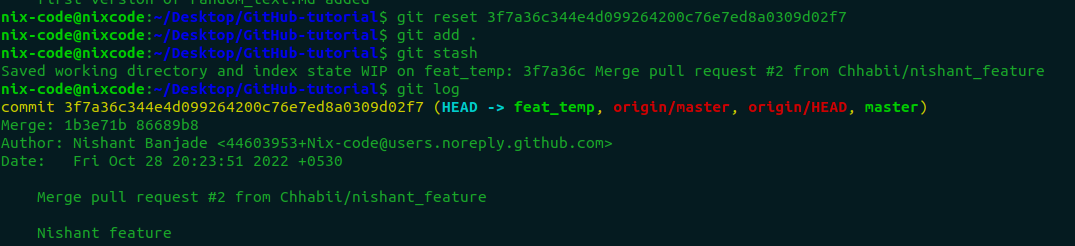
After resetting , you have to force push the commit.
git push origin <branch-name> -f

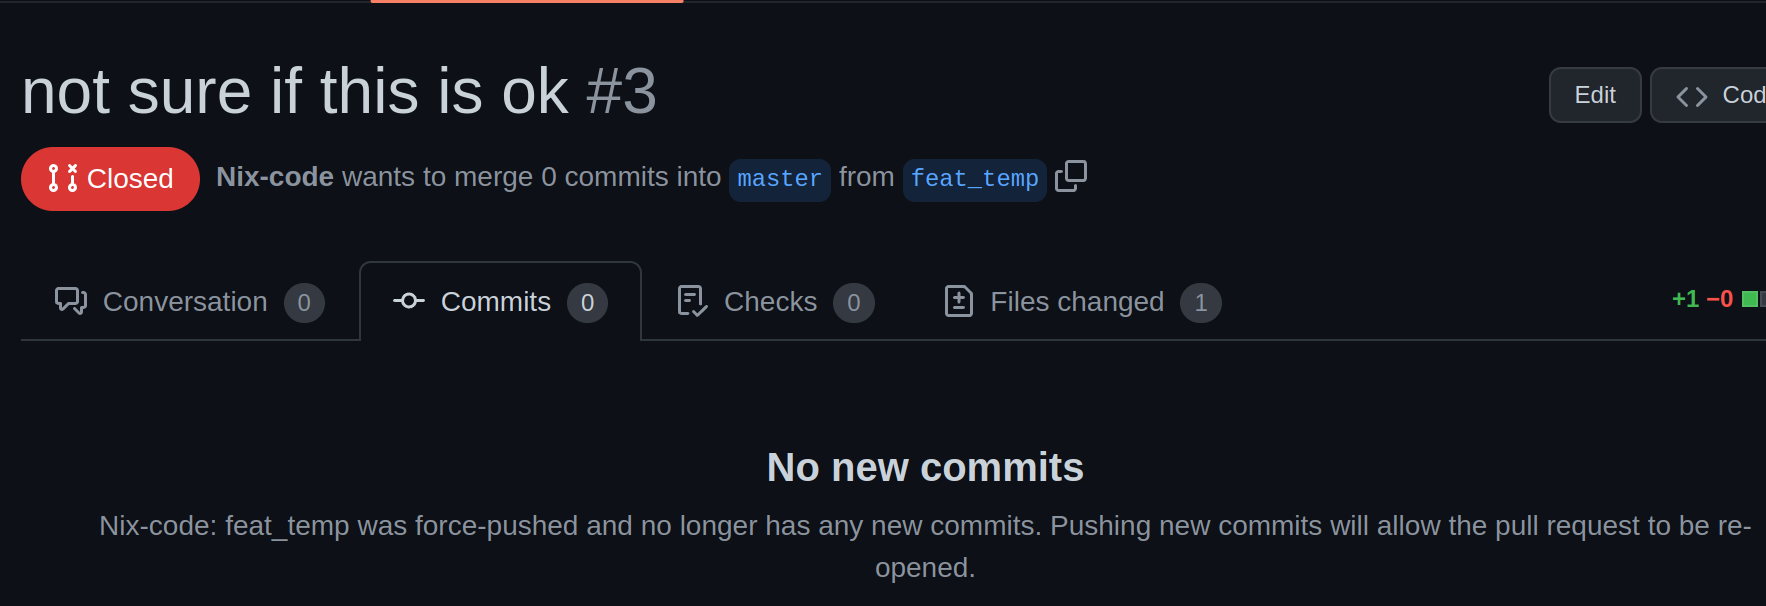
If you go to the pull request section and see the history, your commit message and files are gone and your pull request is auto-closed.
TIP: Never push changes directly on the production environment.
Git Upstreams
Like the literal meaning, upstream refers to something which points to where it originated from. In the git world, upstream refers to the original repo or a branch.
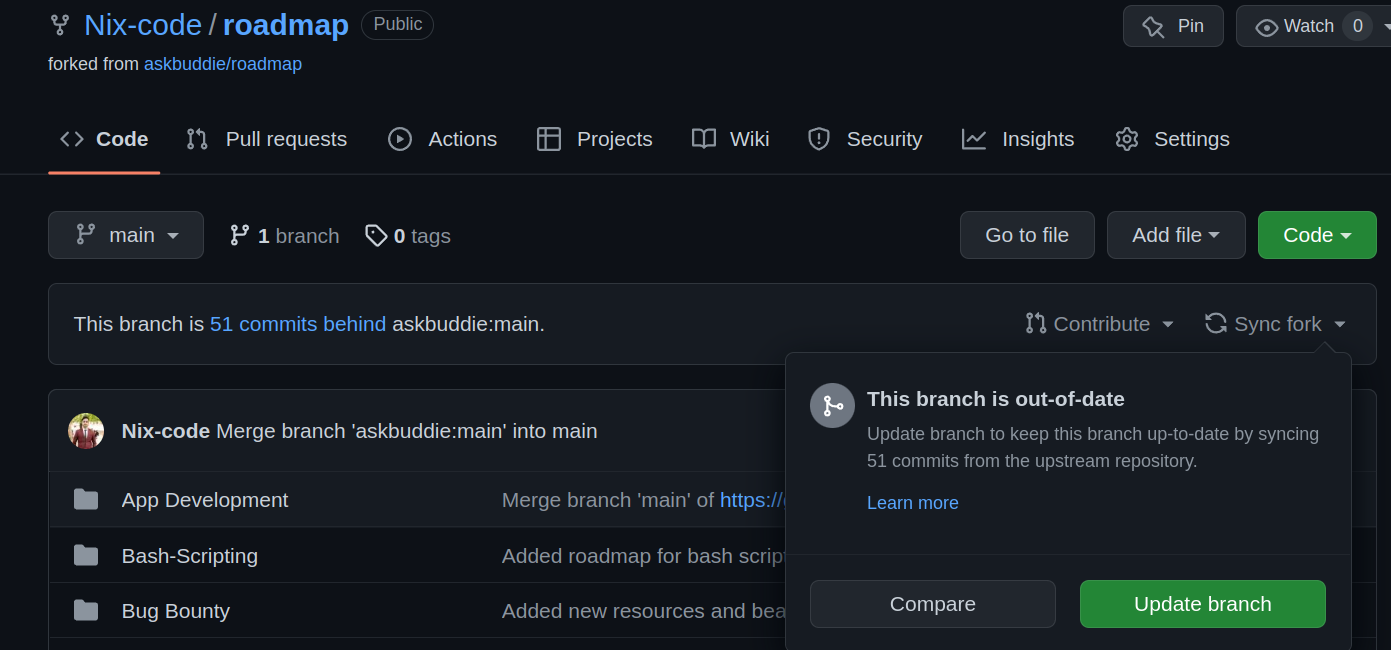
Sometime you want to get updated from the central repository. Someone might have changed the contents of the project. So, you need to get updated. For that purpose you have different ways. If you don't want to code, you can just click button "fetch uptream" or "update branch" in your repository.
- Next way is to use CLI
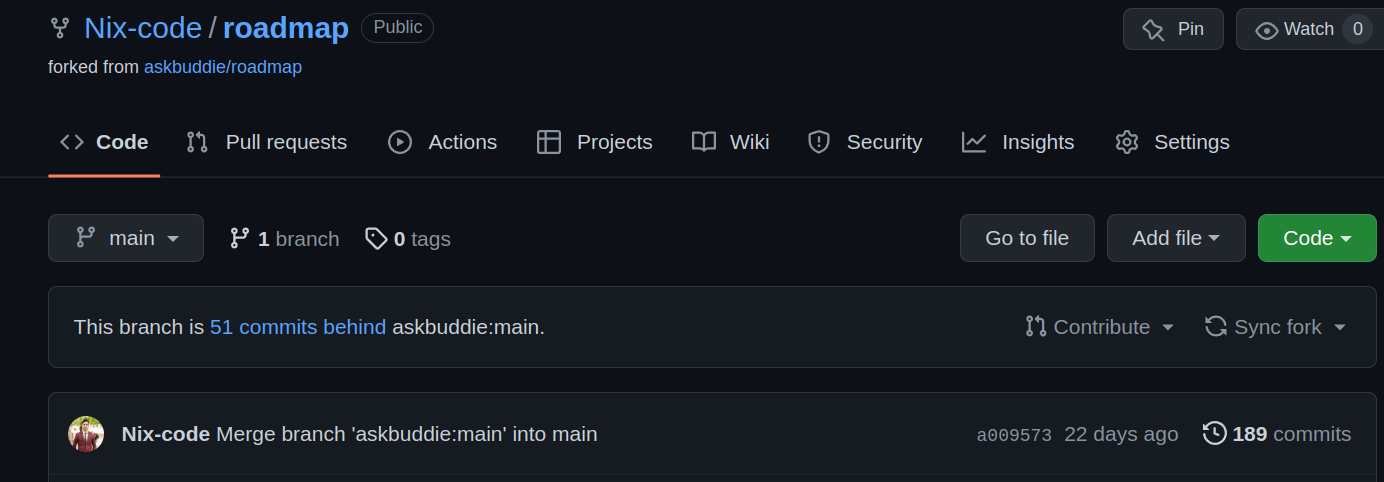
In the forked branch there are 189 commits because the forked repository is not updated. But in reality there might be more commits because in open source projects, other people also contribute to a central repository. Here, central repository is askbuddie/roadmap.
Forked Repository You can see the commit count is 189.
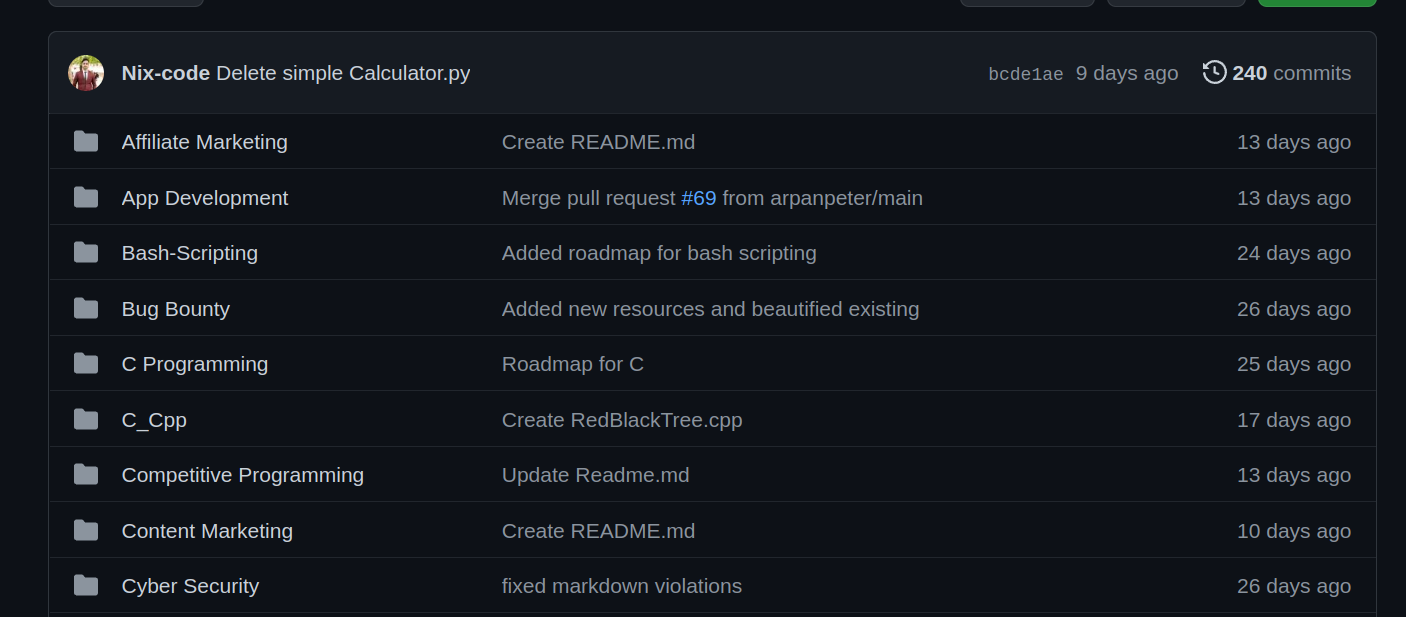
Central Repository The commit count is 240 which is way ahead of forked repository which is not updated.
Using Command Line Interface First of all you need to add the ssh url of the remote repository.
git remote add upstream <SSH-URL>
// checkout the main branch
git checkout main
git fetch --all --prune
Git reset --hard/upstream/main
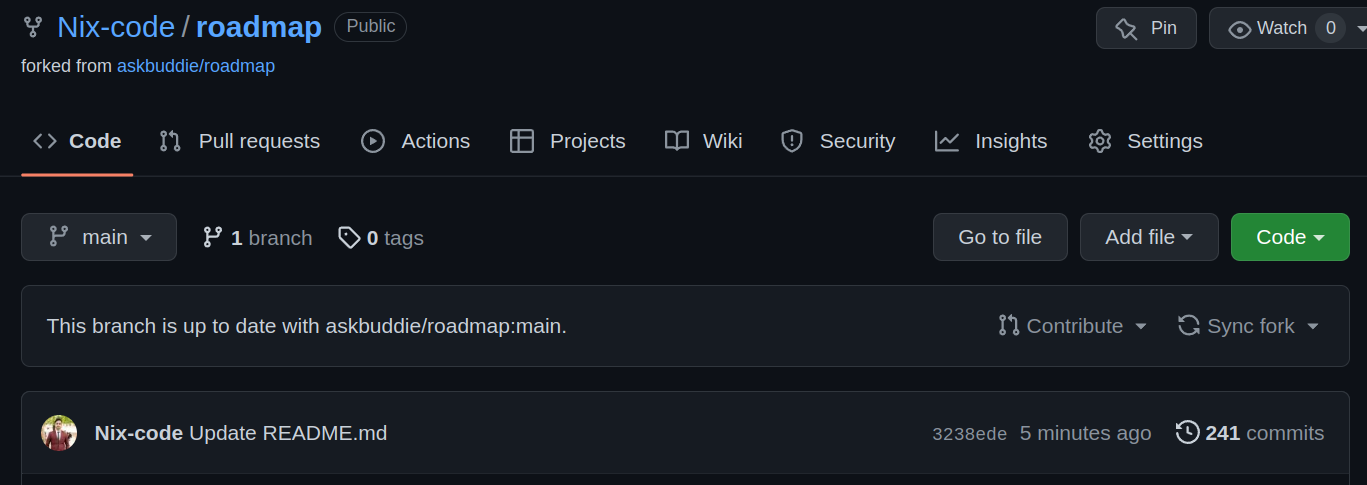
See 241 commits. It is fetched using CLI.
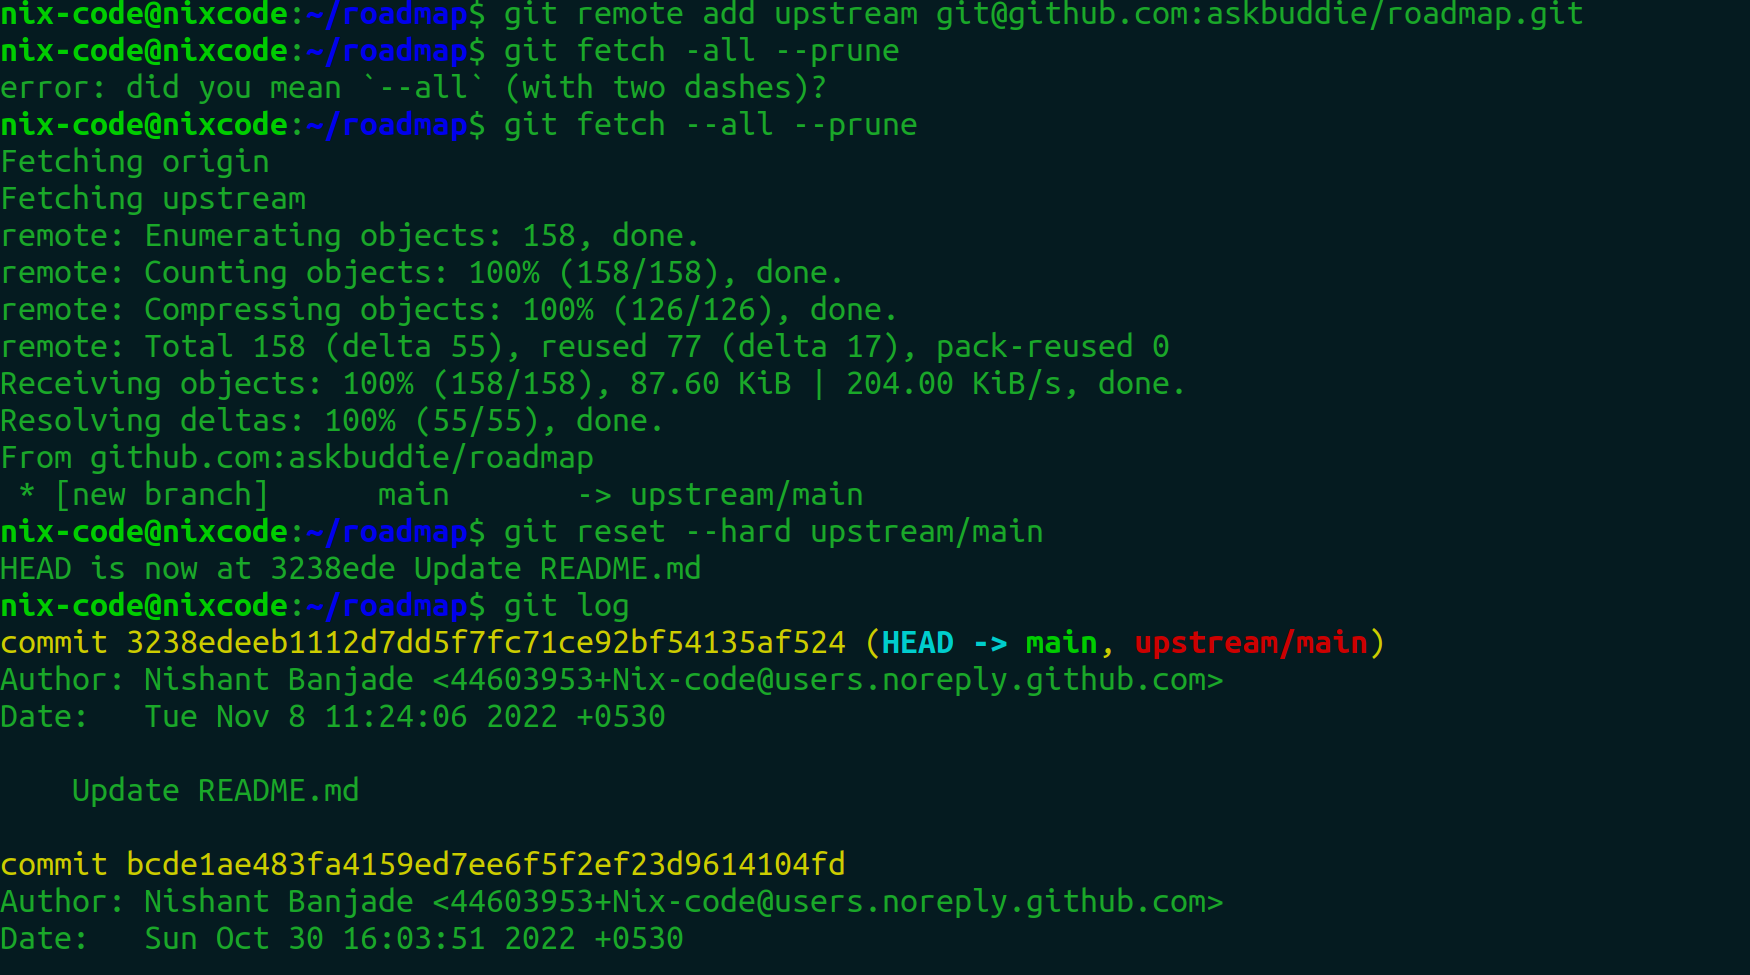
git fetch --prune is the best utility for cleaning outdated branches. It will connect to a shared remote repository remote and fetch all remote branch refs. It will then delete remote refs that are no longer in use on the remote repository.
git reset --hard/upstream/main Resets the index and working tree. Any changes to tracked files in the working tree since are discarded. this will delete all your local changes to master
If you see logs, logs are changed. But it will not be reflected in your GitHub server because you haven’t pushed the changes.
Once you push the changes, it will get reflected in the forked repository.
git push origin main
You can also use git pull command to fetch everything from the central repository to your forked repository.
git pull upstream main
Squash and Rebase in Git
To "squash" in Git means to combine multiple commits into one. You can do this at any point in time (by using Git's "Interactive Rebase" feature)
Sometimes you might commit many things that can be committed once in a single commit. For example: If you have commits about file creation for 7 different files, you can represent “file created” in a single commit at last.
Let’s create 4 different files with four different commit messages as shown in the figure.
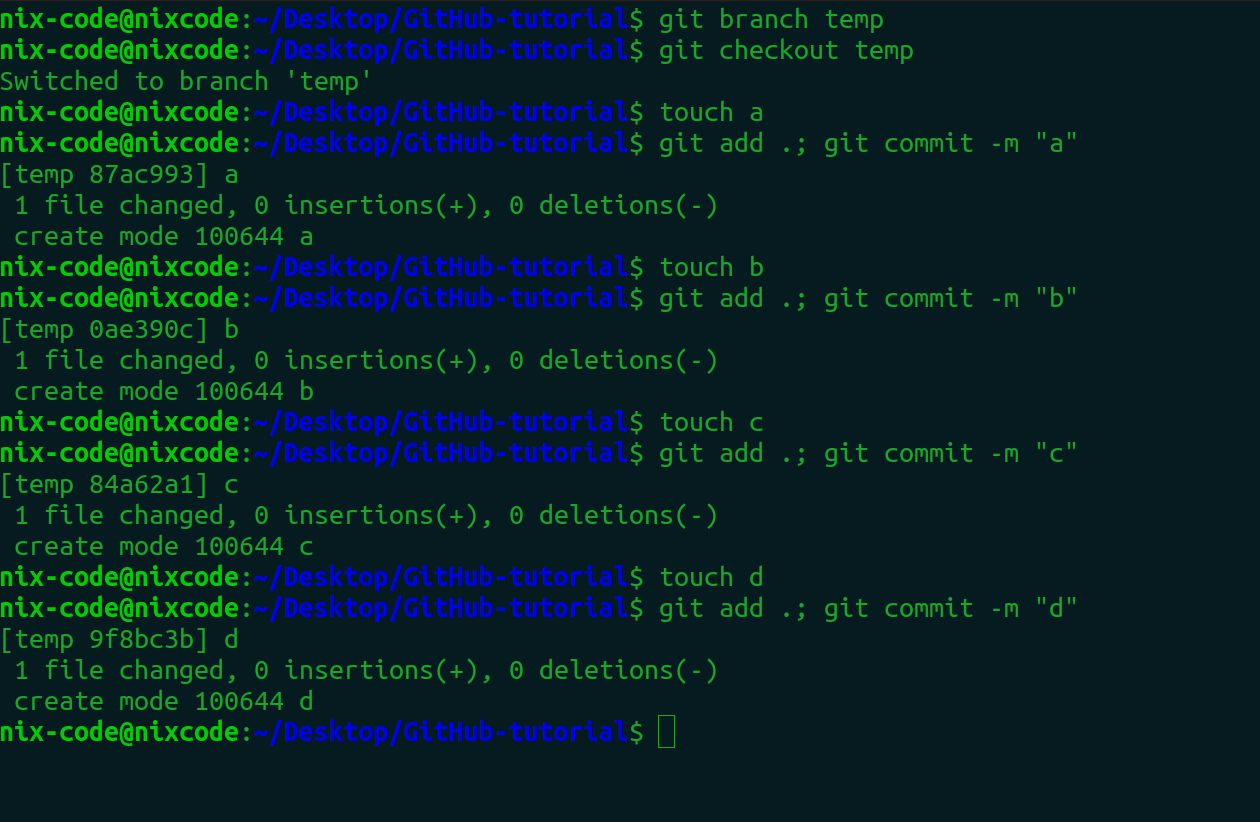
Now you have to see the logs using the “git log” command. Copy the log of the first committed file.
git rebase -i <Hash-value>
Here, -i means interactive environment.
After you type this command, you can see the vim console opens. Initially, it will show four file names with “pick” in the front.
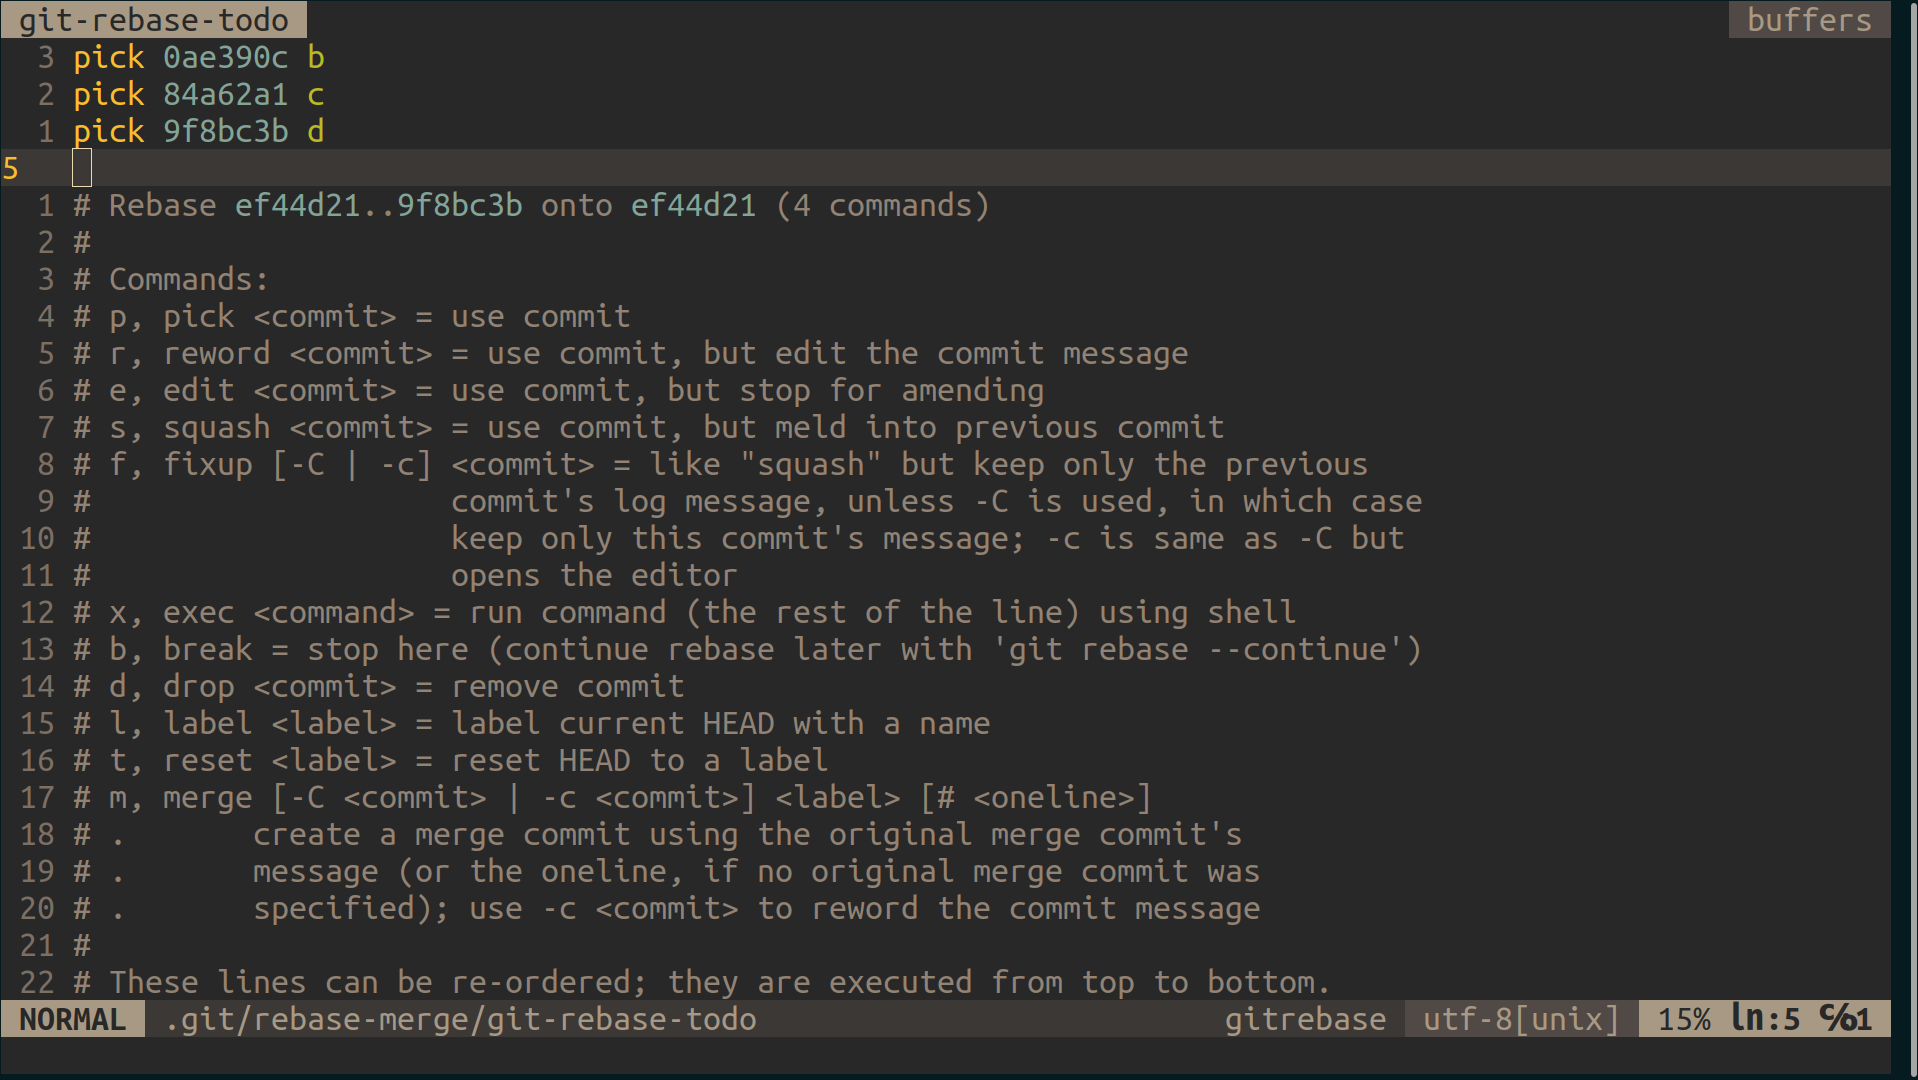
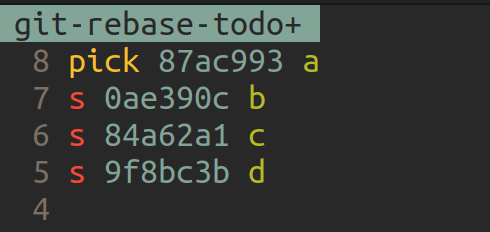
Now, you can change pick to “s” in order to squash the commits. You can squash any commits with the commit of file a.
Save the changes typing Esc
:x
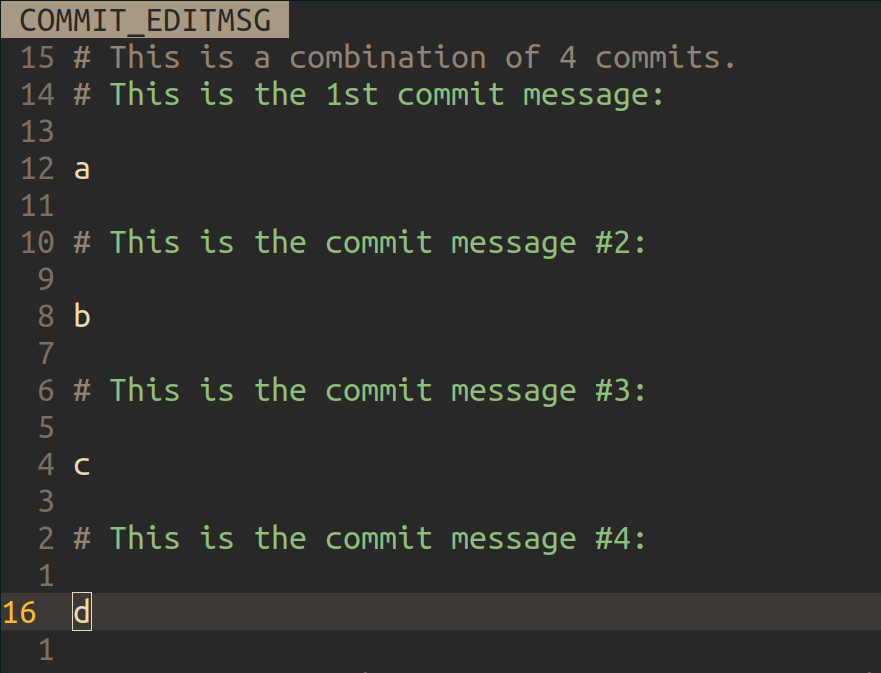
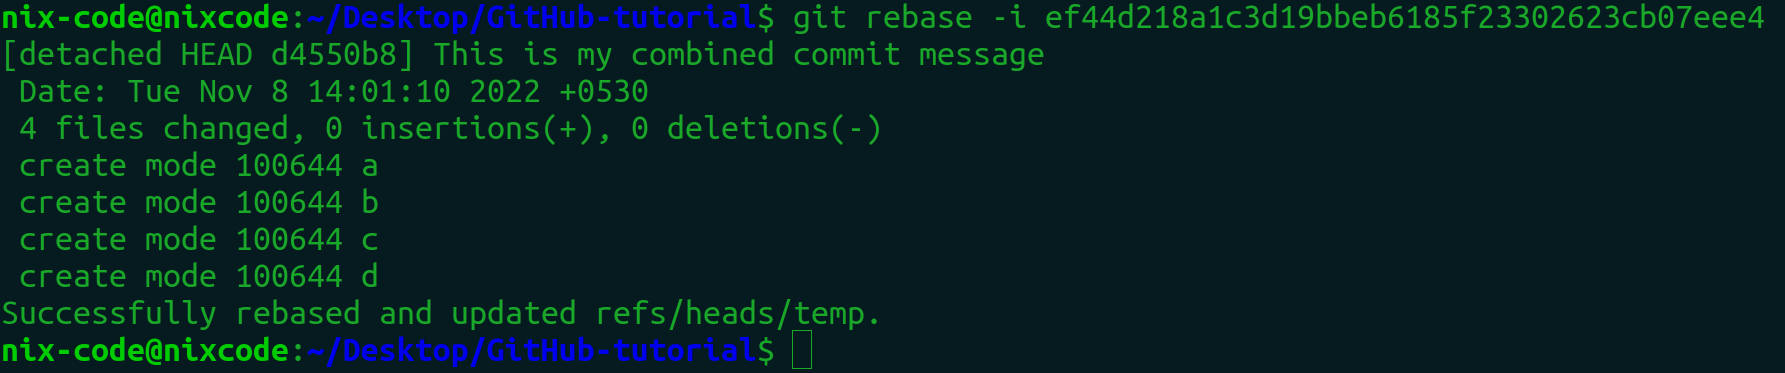
Now delete all the commit message.
After deleting all the commit messages, you can create a fresh commit message on your own.
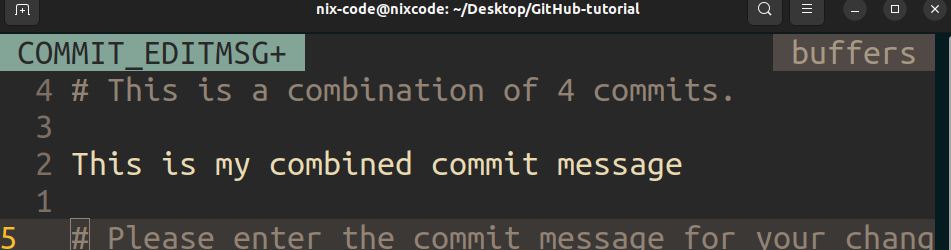
Again type :x, you can see the rebase is successful and your commits are merged.
Merge Conflicts
Merge conflicts occur when competing changes are made to the same line of a file, or when one person edits a file and another person deletes the same file.
Suppose, you change the line no. 5 and your friend also changed the line no.5 . Now git will get confused whose change to keep as final. Git will tell the owner, whose change to keep.
You will see merge conflict, when git is not sure whose PR to merge as both of them have changes in the same line of code.
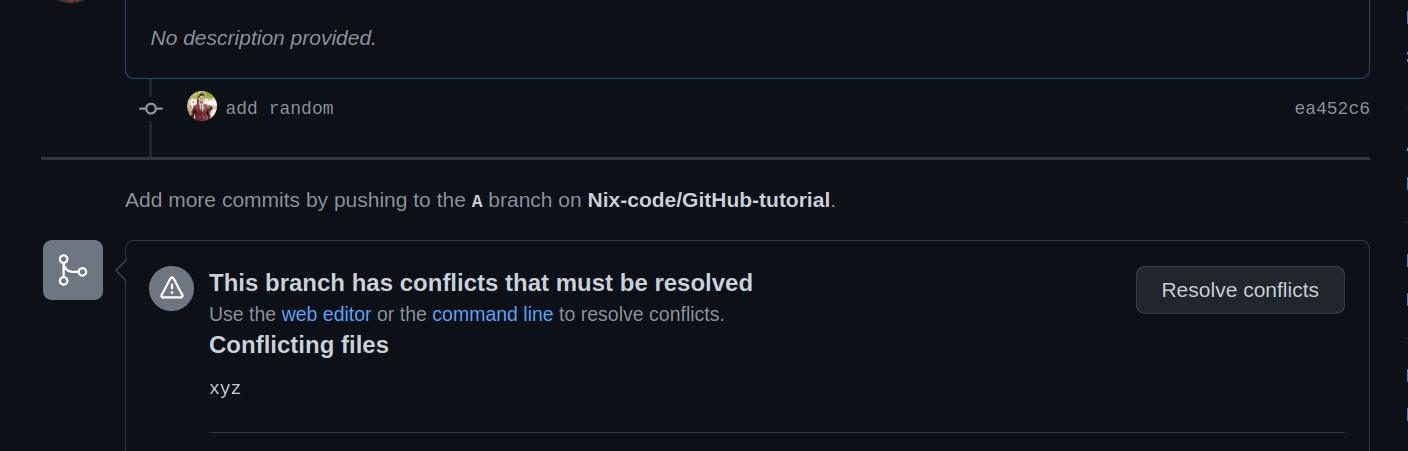
When you try to merge any one of the PRs, you will get notified as there is a merge conflict.
To resolve merge conflicts, you can resolve it manually.
Let's create Merge conflict
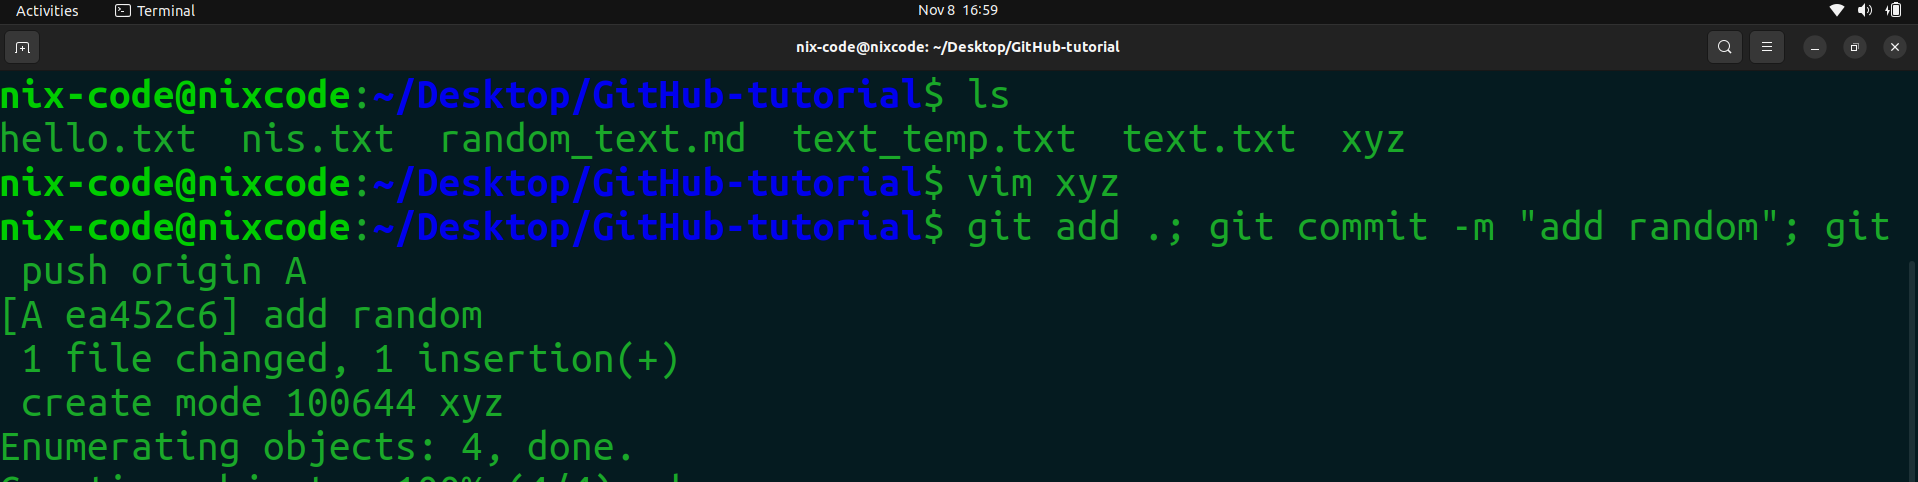
Let’s create two branches with the same filename and write something inside the file. Say the file name is xyz and we write something in a line 1
First File with same name but different content
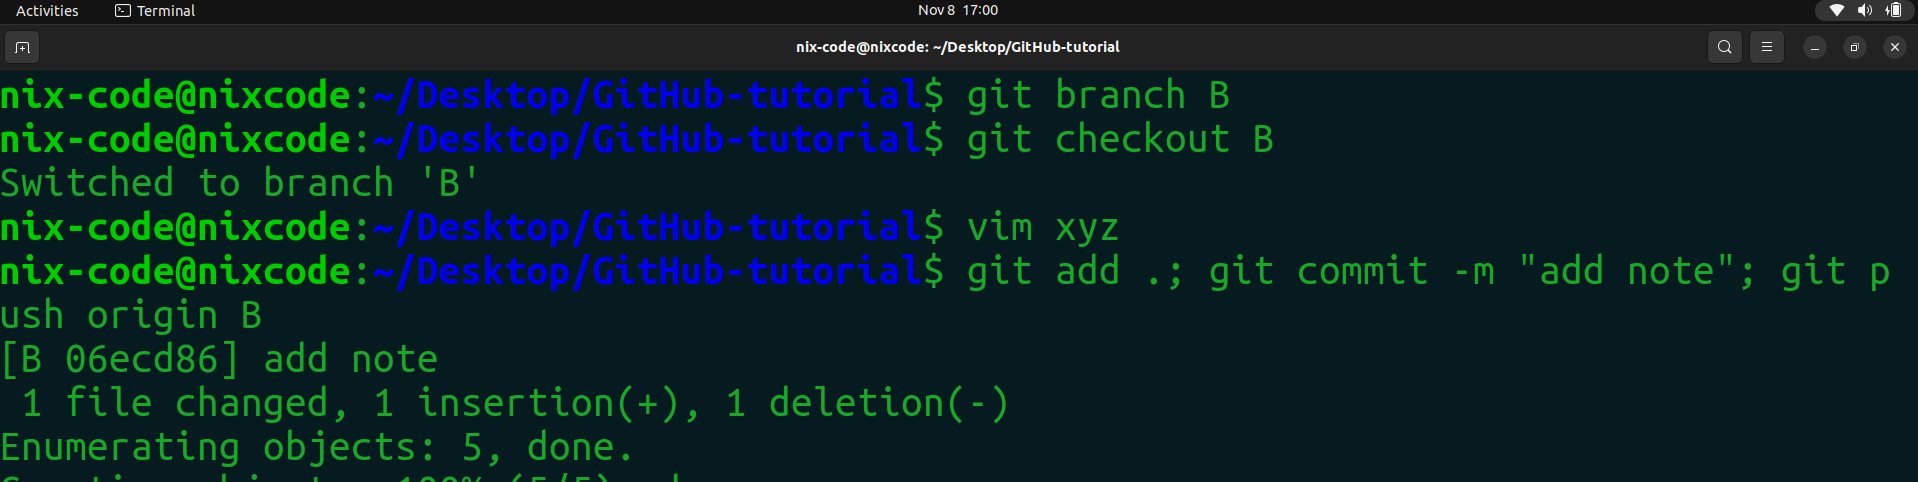
Second File with same name but different content
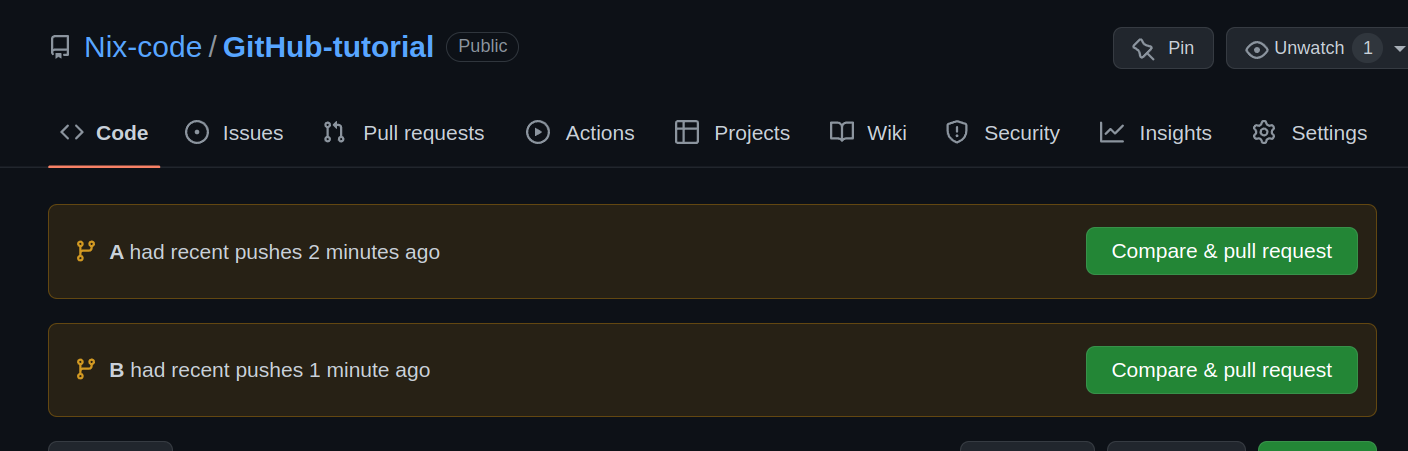
Issue the Pull request for getting merged as shown in the figure.
If you try to merge any of the files, you are likely to get a merge conflict because Git gets confused whose commit to merge as both of the changes may be important.
Merge Conflict
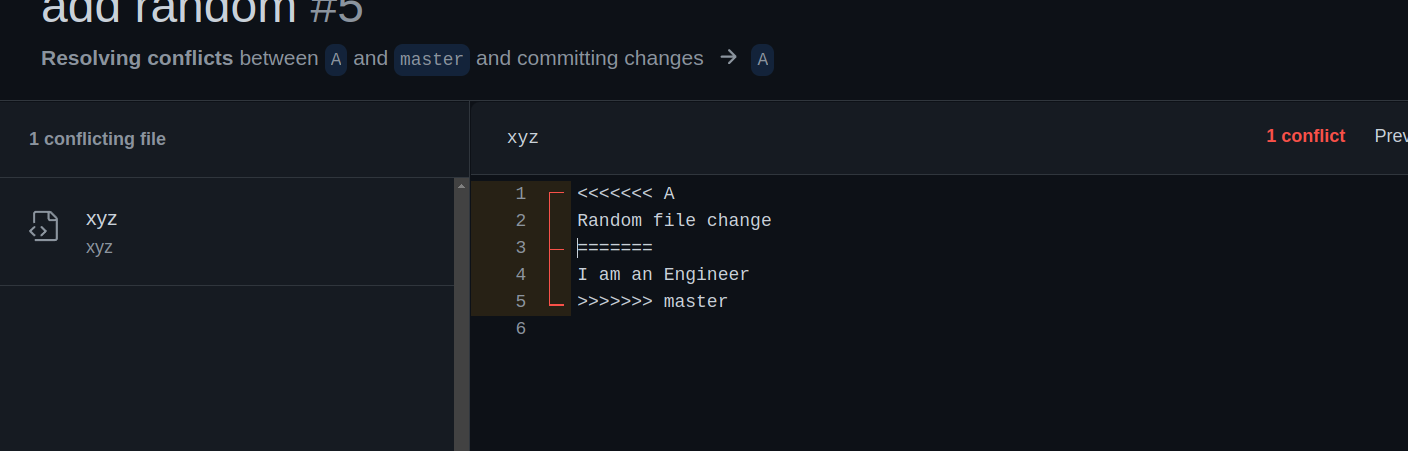
To resolve the merge conflict, you have to resolve it manually as shown in the figure.
Before resolve
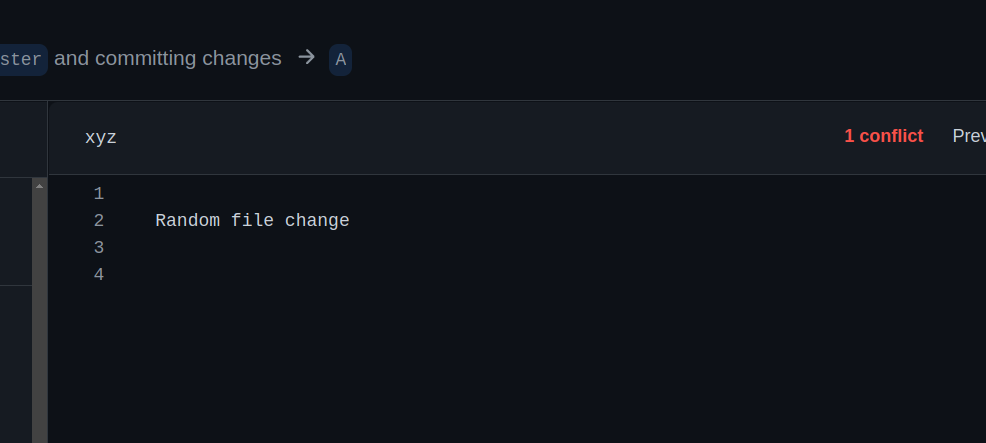
After resolve
If you are reading this right now or in future (after 2022 AD) by any chance, thank you so much for this. If not, I would like to thank myself for writing this Blog.
I thought of writing about Hooks and CI-CD actions, but it might be a very long blog. Hope I will write more advanced topics about Git in future, maybe Part-3.
You can comment if you feel something needs to be improved. Suggestions are appreciated.
Socials
- Website: www.nishantbanjade.com.np
- GitHub: github.com/Nix-code
- LinkedIn: linkedin.com/in/nbanjade
- Twitter: twitter.com/NishantBanjade1
References
- Wikipedia: en.wikipedia.org/wiki/Git
- Unplash: https://unsplash.com/photos/wX2L8L-fGeA
- Atlassian: atlassian.com/git/tutorials/syncing#:~:text...
- Tutorials point: tutorialspoint.com/what-is-git-folder-and-w...
- Kunal Kushwaha : youtube.com/watch?v=apGV9Kg7ics